

Crystal Bath Bombs Project
- Skill Level: Advanced
- Time: 2 hours
- Yield: 10 bath bombs
Project Description
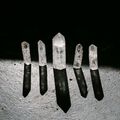
Fine grained Dead Sea salt gives a crystal-like texture to each bath bomb. Then, various colors of mica are painted on the salt to give depth and interest.
Deodorized cocoa butter is added to the bath bomb mixture for structure and skin-loving properties. If you don’t have deodorized cocoa butter, regular cocoa butter will work as well. Dark Crystal Fragrance Oil gives these bath bombs a sweet woody scent that’s perfect for the green color palette.
Because these bath bombs have plenty of oil and mica, polysorbate 80 is used. Polysorbate 80 is an emulsifier that helps the cocoa butter disperse more evenly in the bath water rather than pooling on top. It also prevents the mica from clinging to the side of the tub. We found a minimal amount of color on the tub after using these bath bombs. But because mica likes to cling to residue, give your tub a quick wipe down before use.
This project requires some fine detail paint brushes. Painting the bath bombs does take a little practice, but don’t worry about the design being too perfect – have fun with it. As a finishing touch, Fine Silver Rainbow EcoGlitter is sprayed on top using a powder sprayer. The glitter really gives each bath bomb the perfect sparkly touch.
Want more bath bomb supplies? Check out Bramble Berry's various bath bomb making kits.
You will need:
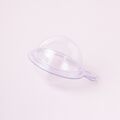
- 10 Bath Bomb Mold & Packages
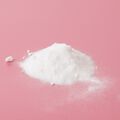
- 26 oz. Sodium Bicarbonate (Baking Soda)
- 13 oz. Citric Acid
- Witch Hazel in a Spray Bottle
- 0.7 oz. Dark Crystal Fragrance Oil
- 3 oz. Deodorized Cocoa Butter
- 0.6 oz. Polysorbate 80
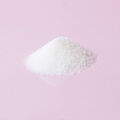
- 6 oz. Fine Grained Dead Sea Salt
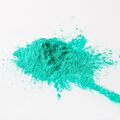
- Shamrock Green Mica
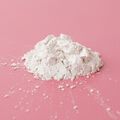
- Super Pearly White Mica
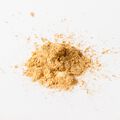
- Gold Sparkle Mica
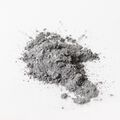
- Pewter Silver Mica
- 1/2 tsp. Fine Silver Rainbow EcoGlitter
- Powder Sprayer (filled with Fine Silver Rainbow EcoGlitter)
Follow these steps:
1
Add 3 ounces of cocoa butter to a small heat-safe container and melt in the microwave using 30-60 second bursts. Because cocoa butter has a high melting point, be very careful when removing the container from the microwave – it will be very hot.
2
Add 0.6 ounces of polysorbate 80 and 0.7 ounces of Dark Crystal Fragrance Oil to the melted cocoa butter. Stir to mix all the ingredients together.
3
In a separate large container, mix together 26 ounces of baking soda and 13 ounces of citric acid. To get rid of clumps in the mixture, you can push the powder through a sifter or break them up with your fingers. Citric acid has a tendency to take off nail polish, so wear gloves to protect your manicure. Thoroughly stir the ingredients together.
4
Add the oil mixture to the baking soda and citric acid. Use gloved hands to thoroughly mix all the ingredients together. Set aside.
5
In a separate bowl, add 6 ounces of fine grained Dead Sea salt, 1/2 tsp. of Fine Silver Rainbow EcoGlitter, and 1/4 tsp. of Shamrock Green Mica. Use a spoon to mix all the ingredients together.
6
Place some green salt into one half of the bath bomb mold about 1/3 of the way. Keep in mind that once the bath bomb is umolded, the salt will be dusted off the bath bomb to give the crystal shape. Don’t be afraid to use a deep layer of salt.
7
Test the consistency of the bath bomb mixture. The perfect consistency for molding is similar to wet sand and holds its shape when squeezed. If it’s too dry, use one hand to spritz the mixture with witch hazel and one to mix. Continue spritzing until the mixture holds its shape. Cover the salt with bath bomb mixture. Gently pack the bath bomb mixture into the mold, but leave some loose mixture on top.
8
Fill the other half of the bath bomb mold with mixture, packing in gently and leaving some loose mixture on the top. Overfilling each half slightly with loose mixture helps the 2 halves stick together. Wipe away any mixture that got in the seams of the mold, match the eyelets of each side up, and press together. To avoid any imperfections on your bath bomb, make sure to direct pressure to the edges of the mold rather than the center.
9
Continue filling up each bath bomb with the salt and bath bomb mixture. Allow the bath bombs to dry and harden in the molds. For the best results, we recommend leaving the bath bombs in the mold overnight. The longer they dry, the more durable they will be.
10
Remove the bath bombs from the mold by pulling on both eyelets. Use your finger to gently brush away the extra salt - save the leftovers for future projects. You’ll be left with a bath bomb with an indent.
11
In separate containers, mix together 1/2 tsp. of Super Pearly White Mica, Shamrock Green Mica, Gold Sparkle Mica, and Pewter Silver Mica into about 1/2 Tbsp. of 99% isopropyl alcohol. The mica mixture should be thin but still saturated. As you paint, you’ll find your preference of mica paint texture. Add more mica or alcohol according to your preference throughout the painting process. Fill a small container with alcohol to rinse your brush and blend colors. Finally, fill the Powder Sprayer with Fine Silver Rainbow EcoGlitter.
12
Starting with the Shamrock Green Mica, use a fine detail paint brush to apply the mica mixture to the deepest areas of the bath bombs. This gives them depth. Use the Shamrock Green Mica to also line the salt area of the bath bomb.
13
Use another paint brush to apply the white mica mixture to the highest points of the salt.
14
Apply the gold mica mixture to various points of the salt, and use a clean brush with alcohol to blend. A little white mica is also great for blending. Apply a thin line of gold mica to the outline of the salt for more definition. Remember, this is an art not a science. There is no right or wrong way to paint these bath bombs. The more you paint, the easier it gets.
15
Apply very thin lines of the silver mica to the deep areas of the salt and around the edges. A little silver goes a long way, so apply sparingly.
16
Spray the Fine Silver Rainbow EcoGlitter to the top of the salt for a sparkly finishing touch. Allow the mica paint to thoroughly dry. Once you’re ready to use, place the bath bomb into hot tub water and enjoy! These bath bombs are very delicate, so handle with care.
Tutorial credits
Photographer: Amanda Kerzman
Crystal Bath Bombs Project
- Skill Level: Advanced
- Time: 2 hours
- Yield: 10 bath bombs
Project Description
Fine grained Dead Sea salt gives a crystal-like texture to each bath bomb. Then, various colors of mica are painted on the salt to give depth and interest.
Deodorized cocoa butter is added to the bath bomb mixture for structure and skin-loving properties. If you don’t have deodorized cocoa butter, regular cocoa butter will work as well. Dark Crystal Fragrance Oil gives these bath bombs a sweet woody scent that’s perfect for the green color palette.
Because these bath bombs have plenty of oil and mica, polysorbate 80 is used. Polysorbate 80 is an emulsifier that helps the cocoa butter disperse more evenly in the bath water rather than pooling on top. It also prevents the mica from clinging to the side of the tub. We found a minimal amount of color on the tub after using these bath bombs. But because mica likes to cling to residue, give your tub a quick wipe down before use.
This project requires some fine detail paint brushes. Painting the bath bombs does take a little practice, but don’t worry about the design being too perfect – have fun with it. As a finishing touch, Fine Silver Rainbow EcoGlitter is sprayed on top using a powder sprayer. The glitter really gives each bath bomb the perfect sparkly touch.
Want more bath bomb supplies? Check out Bramble Berry's various bath bomb making kits.
You will need:
- 10 Bath Bomb Mold & Packages
- 26 oz. Sodium Bicarbonate (Baking Soda)
- 13 oz. Citric Acid
- Witch Hazel in a Spray Bottle
- 0.7 oz. Dark Crystal Fragrance Oil
- 3 oz. Deodorized Cocoa Butter
- 0.6 oz. Polysorbate 80
- 6 oz. Fine Grained Dead Sea Salt
- Shamrock Green Mica
- Super Pearly White Mica
- Gold Sparkle Mica
- Pewter Silver Mica
- 1/2 tsp. Fine Silver Rainbow EcoGlitter
- Powder Sprayer (filled with Fine Silver Rainbow EcoGlitter)
Follow these steps:
1
Add 3 ounces of cocoa butter to a small heat-safe container and melt in the microwave using 30-60 second bursts. Because cocoa butter has a high melting point, be very careful when removing the container from the microwave – it will be very hot.
2
Add 0.6 ounces of polysorbate 80 and 0.7 ounces of Dark Crystal Fragrance Oil to the melted cocoa butter. Stir to mix all the ingredients together.
3
In a separate large container, mix together 26 ounces of baking soda and 13 ounces of citric acid. To get rid of clumps in the mixture, you can push the powder through a sifter or break them up with your fingers. Citric acid has a tendency to take off nail polish, so wear gloves to protect your manicure. Thoroughly stir the ingredients together.
4
Add the oil mixture to the baking soda and citric acid. Use gloved hands to thoroughly mix all the ingredients together. Set aside.
5
In a separate bowl, add 6 ounces of fine grained Dead Sea salt, 1/2 tsp. of Fine Silver Rainbow EcoGlitter, and 1/4 tsp. of Shamrock Green Mica. Use a spoon to mix all the ingredients together.
6
Place some green salt into one half of the bath bomb mold about 1/3 of the way. Keep in mind that once the bath bomb is umolded, the salt will be dusted off the bath bomb to give the crystal shape. Don’t be afraid to use a deep layer of salt.
7
Test the consistency of the bath bomb mixture. The perfect consistency for molding is similar to wet sand and holds its shape when squeezed. If it’s too dry, use one hand to spritz the mixture with witch hazel and one to mix. Continue spritzing until the mixture holds its shape. Cover the salt with bath bomb mixture. Gently pack the bath bomb mixture into the mold, but leave some loose mixture on top.
8
Fill the other half of the bath bomb mold with mixture, packing in gently and leaving some loose mixture on the top. Overfilling each half slightly with loose mixture helps the 2 halves stick together. Wipe away any mixture that got in the seams of the mold, match the eyelets of each side up, and press together. To avoid any imperfections on your bath bomb, make sure to direct pressure to the edges of the mold rather than the center.
9
Continue filling up each bath bomb with the salt and bath bomb mixture. Allow the bath bombs to dry and harden in the molds. For the best results, we recommend leaving the bath bombs in the mold overnight. The longer they dry, the more durable they will be.
10
Remove the bath bombs from the mold by pulling on both eyelets. Use your finger to gently brush away the extra salt - save the leftovers for future projects. You’ll be left with a bath bomb with an indent.
11
In separate containers, mix together 1/2 tsp. of Super Pearly White Mica, Shamrock Green Mica, Gold Sparkle Mica, and Pewter Silver Mica into about 1/2 Tbsp. of 99% isopropyl alcohol. The mica mixture should be thin but still saturated. As you paint, you’ll find your preference of mica paint texture. Add more mica or alcohol according to your preference throughout the painting process. Fill a small container with alcohol to rinse your brush and blend colors. Finally, fill the Powder Sprayer with Fine Silver Rainbow EcoGlitter.
12
Starting with the Shamrock Green Mica, use a fine detail paint brush to apply the mica mixture to the deepest areas of the bath bombs. This gives them depth. Use the Shamrock Green Mica to also line the salt area of the bath bomb.
13
Use another paint brush to apply the white mica mixture to the highest points of the salt.
14
Apply the gold mica mixture to various points of the salt, and use a clean brush with alcohol to blend. A little white mica is also great for blending. Apply a thin line of gold mica to the outline of the salt for more definition. Remember, this is an art not a science. There is no right or wrong way to paint these bath bombs. The more you paint, the easier it gets.
15
Apply very thin lines of the silver mica to the deep areas of the salt and around the edges. A little silver goes a long way, so apply sparingly.
16
Spray the Fine Silver Rainbow EcoGlitter to the top of the salt for a sparkly finishing touch. Allow the mica paint to thoroughly dry. Once you’re ready to use, place the bath bomb into hot tub water and enjoy! These bath bombs are very delicate, so handle with care.
Tutorial credits
Photographer: Amanda Kerzman