


Agate Spin Swirl Soap Project
- Skill Level: Advanced
- Time: 2 hours
- Yield: About 6 pounds of soap
Project Description
The spin swirl is an advanced technique that involves layering colors of soap in the mold. Once the mold is full, it’s spun on a Lazy Susan or directly on the counter. The spinning motion causes the soap to swirl together. See the spin swirl in action here.
Once the soap is swirled, pieces of SFIC LCP Clear Melt and Pour Soap Base are sprinkled into the corner of each bar. LCP soap base has less glycerin than regular melt and pour soap, which helps prevent sweating. But, because cold process soap needs to cure unwrapped, you may still experience some glycerin dew. Our bars got a little bit, but the glycerin dew actually added some extra sparkle to the embeds!
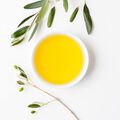
The key to the spin swirl is formulating a recipe that gives you plenty of time to pour all the layers. Once the layers are poured, the soap needs to be liquid enough to move during the spinning process. This recipe contains plenty of slow-moving oils like olive and apricot kernel oil. It's scented with Rose Quartz Fragrance Oil, which doesn’t accelerate in cold process soap.
If the soap needs to be fluid for a long period of time, you may be wondering why there is a water discount. The first time we made this soap, we experienced heavy soda ash on the bars. Soda ash is more likely to occur if the soap is poured thin and temperatures are kept cool, like this batch. A water discount is the best way to prevent soda ash. Luckily, even with the water discount, we were still able to create a spin swirl. Just remember to use your stick blender sparingly and work quickly.
You will need:
- Embeds:
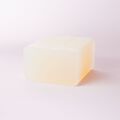
- 10 oz. LCP Clear Melt and Pour Soap
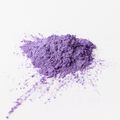
- Lavender Mica
- Snowflake Sparkle Mica
- Base:
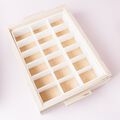
- 18 Bar Birchwood Mold
- Silicone Liner for 18 Bar Mold
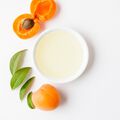
- 8.1 oz. Apricot Kernel Oil (15%)
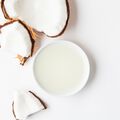
- 13.5 oz. Coconut Oil (25%)
- 21.6 oz. Olive Oil (40%)
- 10.8 oz. Palm Oil (20%)
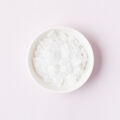
- 7.6 oz. Sodium Hydroxide Lye
- 15.1 oz. Distilled Water (15% water discount)
- 3.5 oz. Rose Quartz Fragrance Oil
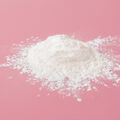
- 1 tsp. Titanium Dioxide
- 1/2 tsp. Black Oxide
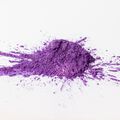
- 1 tsp. Queen’s Purple Mica
- 1 tsp. Lavender Mica
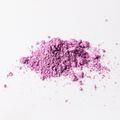
- 1 tsp. Ultramarine Pink
Follow these steps:
MAKE THE EMBEDS
1
Chop and melt 10 ounces of LCP Clear Soap Base in the microwave using 10 second bursts. Once melted, add 1/4 tsp. of Lavender Mica. Stir thoroughly and pour the soap into a mold. The exact shape doesn’t matter because the soap will be cut into pieces. We poured the soap into the 12 Bar Rectangle Silicone Mold. Spritz with 99% Isopropyl Alcohol to get rid of bubbles and allow to fully cool and harden.
2
Once the soap is completely cool and firm, remove from the mold and cut into small pieces. Don’t worry about making them perfect. In fact, they look better when they are random shapes and sizes. Dust the embeds with Lavender Mica and Snowflake Sparkle Mica. Mix to completely cover the embeds. Set aside.
MAKE THE BASE
FRAGRANCE PREP: Measure 3.5 ounces of Rose Quartz Fragrance Oil into a small glass container and set aside.
COLORANT PREP: Disperse 1 teaspoon of titanium dioxide into 1 tablespoon of sunflower or sweet almond oil (or any other liquid oil). Then in separate containers, disperse 1 teaspoon of the Lavender Mica, Queen’s Purple Mica, and Ultramarine Pink into 1 tablespoon of lightweight liquid oil. Finally, disperse 1/2 teaspoon of Black Oxide into 1/2 tablespoon oil. Use a mini mixer to get rid of any clumps. Optional: To ensure that the titanium dioxide blends smoothly into the soap batter, we recommend micronizing it before dispersing it in oil. Use a coffee grinder to blend the colorant to break up any clumps of color and prevent streaks of white from showing in the final soap. We like to use a coffee grinder that has a removable, stainless steel mixing area for easy cleaning.
NOTE: This project was originally made with Radiant Plum Colorant, which was discontinued. It was replaced with Ultramarine Pink, so the colors will vary slightly from the pictures below.
SAFETY FIRST: Suit up for safe handling practices. That means goggles, gloves, and long sleeves. Make sure kids, pets, other distractions, and tripping hazards are out of the house or don’t have access to your soaping space. Always soap in a well-ventilated area.
1
Slowly and carefully add 7.6 ounces of lye to 15.1 ounces of water and gently stir until the lye has fully dissolved and the liquid is clear. Set aside to cool. Optional: Add 3.5 teaspoons of sodium lactate to help harden the soap so it unmolds more quickly.
2
Melt and combine 13.5 ounces of coconut oil, 8.1 ounces of apricot kernel oil, 21.6 ounces of olive oil, and 10.8 ounces of palm oil (remember to fully melt then mix your entire container of palm oil before portioning). Once the lye water and the oils have cooled to 130° F or below (and are ideally within 10 degrees of each other), add the lye water to the oils and stick blend until a very thin trace.
3
Be careful to not over emulsify the soap - it should be very thin. Split the batch into 5 containers. Three of the containers should contain 400 mL, one should contain 600 mL, and the last should contain 300 mL.
4
Add the dispersed colorants to the 5 containers in the following amounts. To work as quickly as possible, we added the colorants directly into the containers first. Use a whisk to fully incorporate.
- Container A (400 mL): All dispersed Ultramarine Pink
- Container B (400 mL): 2 tsp. dispersed Lavender Mica
- Container C (400 mL): 2 1/2 tsp. dispersed Queen’s Purple Mica
- Container D (600 mL): 2 tsp. dispersed titanium dioxide + 1/2 tsp. dispersed Lavender Mica
- Container E (300 mL): 1 tsp. dispersed Queen’s Purple Mica + 1/8 tsp. dispersed Black Oxide
5
Add the fragrance oil blend proportionally between the containers (it’s okay to eyeball it). Use a whisk to thoroughly incorporate. The soap should still be very thin.
6
Now it’s time to pour. We like to place the mold on a Lazy Susan to help spin the soap. The order in which you pour the colors into the mold is up to you. For this soap, we did not stick to the same color order throughout. We just poured the colors into the mold depending on what looked good. With each pour, keep in mind there is less dark purple soap and more white than the other colors. Pouring the white more frequently between the purple shades gives nice contrast.
Pour a shade of purple soap into one corner of the mold. Count to 3 during the pour to get an even amount. Pour a different color in the opposite corner of the mold, counting to 3. Start pouring various colors into both corners of the mold. As you layer the colors, the soap is pushed toward the center of the mold. Work as quickly as possible during this process, as the soap will continue to thicken up with time. Every now and then, give the colors a whisk to help keep them fluid.
7
Once the colors meet in the center, begin pouring soap into the empty corners of the mold. Every now and then, give the mold a little shake to disperse the soap. Working quickly, continue to pour the soap in the mold until it’s gone.
8
Give the mold a few firm taps on the counter to help eliminate air bubbles and to help the layers of soap settle. Begin to spin the Lazy Susan, stopping it quickly to help give the soap movement. You want the centrifugal force created by the spin and stop movement to move the soap in various directions within the mold. Be careful not to spin too hard, or the soap may spill out of the mold.
9
Continue swirling until you’re happy with the pattern. Be careful to not over-swirl the soap, or the colors will muddle together.
10
Once you’re happy with the swirl, place the divider set into the mold until it reaches the bottom. Begin placing the melt and pour pieces into the corner of each bar. Use your fingers to gently press the embeds into the soap to help them stick.
11
Spray the soap with 99% isopropyl alcohol to help prevent soda ash. The melt and pour embeds can melt if they become too hot, so store this soap in a cool place. Allow them to sit in the dividers for at least 3 days. Because this is a soft recipe and the soap was poured at a thin trace, it may take a little longer to unmold. The water discount helps speed up the process.
After 3 days, check to see if the silicone mold pulls away easily from the soap. If it does, remove the soap from the silicone mold. If it doesn’t, give the soap another day or two to harden. Gently remove the soap from the dividers. To prevent tearing, do not pull the dividers. Push the soap down, or slide the dividers up or down to remove the soap without tearing. Allow the soap to cure for 4-6 weeks, and enjoy!
Tutorial credits
Photographer: Amanda Kerzman
Agate Spin Swirl Soap Project
- Skill Level: Advanced
- Time: 2 hours
- Yield: About 6 pounds of soap
Project Description
The spin swirl is an advanced technique that involves layering colors of soap in the mold. Once the mold is full, it’s spun on a Lazy Susan or directly on the counter. The spinning motion causes the soap to swirl together. See the spin swirl in action here.
Once the soap is swirled, pieces of SFIC LCP Clear Melt and Pour Soap Base are sprinkled into the corner of each bar. LCP soap base has less glycerin than regular melt and pour soap, which helps prevent sweating. But, because cold process soap needs to cure unwrapped, you may still experience some glycerin dew. Our bars got a little bit, but the glycerin dew actually added some extra sparkle to the embeds!
The key to the spin swirl is formulating a recipe that gives you plenty of time to pour all the layers. Once the layers are poured, the soap needs to be liquid enough to move during the spinning process. This recipe contains plenty of slow-moving oils like olive and apricot kernel oil. It's scented with Rose Quartz Fragrance Oil, which doesn’t accelerate in cold process soap.
If the soap needs to be fluid for a long period of time, you may be wondering why there is a water discount. The first time we made this soap, we experienced heavy soda ash on the bars. Soda ash is more likely to occur if the soap is poured thin and temperatures are kept cool, like this batch. A water discount is the best way to prevent soda ash. Luckily, even with the water discount, we were still able to create a spin swirl. Just remember to use your stick blender sparingly and work quickly.
You will need:
- Embeds:
- 10 oz. LCP Clear Melt and Pour Soap
- Lavender Mica
- Snowflake Sparkle Mica
- Base:
- 18 Bar Birchwood Mold
- Silicone Liner for 18 Bar Mold
- 8.1 oz. Apricot Kernel Oil (15%)
- 13.5 oz. Coconut Oil (25%)
- 21.6 oz. Olive Oil (40%)
- 10.8 oz. Palm Oil (20%)
- 7.6 oz. Sodium Hydroxide Lye
- 15.1 oz. Distilled Water (15% water discount)
- 3.5 oz. Rose Quartz Fragrance Oil
- 1 tsp. Titanium Dioxide
- 1/2 tsp. Black Oxide
- 1 tsp. Queen’s Purple Mica
- 1 tsp. Lavender Mica
- 1 tsp. Ultramarine Pink
Follow these steps:
MAKE THE EMBEDS
1
Chop and melt 10 ounces of LCP Clear Soap Base in the microwave using 10 second bursts. Once melted, add 1/4 tsp. of Lavender Mica. Stir thoroughly and pour the soap into a mold. The exact shape doesn’t matter because the soap will be cut into pieces. We poured the soap into the 12 Bar Rectangle Silicone Mold. Spritz with 99% Isopropyl Alcohol to get rid of bubbles and allow to fully cool and harden.
2
Once the soap is completely cool and firm, remove from the mold and cut into small pieces. Don’t worry about making them perfect. In fact, they look better when they are random shapes and sizes. Dust the embeds with Lavender Mica and Snowflake Sparkle Mica. Mix to completely cover the embeds. Set aside.
MAKE THE BASE
FRAGRANCE PREP: Measure 3.5 ounces of Rose Quartz Fragrance Oil into a small glass container and set aside.
COLORANT PREP: Disperse 1 teaspoon of titanium dioxide into 1 tablespoon of sunflower or sweet almond oil (or any other liquid oil). Then in separate containers, disperse 1 teaspoon of the Lavender Mica, Queen’s Purple Mica, and Ultramarine Pink into 1 tablespoon of lightweight liquid oil. Finally, disperse 1/2 teaspoon of Black Oxide into 1/2 tablespoon oil. Use a mini mixer to get rid of any clumps. Optional: To ensure that the titanium dioxide blends smoothly into the soap batter, we recommend micronizing it before dispersing it in oil. Use a coffee grinder to blend the colorant to break up any clumps of color and prevent streaks of white from showing in the final soap. We like to use a coffee grinder that has a removable, stainless steel mixing area for easy cleaning.
NOTE: This project was originally made with Radiant Plum Colorant, which was discontinued. It was replaced with Ultramarine Pink, so the colors will vary slightly from the pictures below.
SAFETY FIRST: Suit up for safe handling practices. That means goggles, gloves, and long sleeves. Make sure kids, pets, other distractions, and tripping hazards are out of the house or don’t have access to your soaping space. Always soap in a well-ventilated area.
1
Slowly and carefully add 7.6 ounces of lye to 15.1 ounces of water and gently stir until the lye has fully dissolved and the liquid is clear. Set aside to cool. Optional: Add 3.5 teaspoons of sodium lactate to help harden the soap so it unmolds more quickly.
2
Melt and combine 13.5 ounces of coconut oil, 8.1 ounces of apricot kernel oil, 21.6 ounces of olive oil, and 10.8 ounces of palm oil (remember to fully melt then mix your entire container of palm oil before portioning). Once the lye water and the oils have cooled to 130° F or below (and are ideally within 10 degrees of each other), add the lye water to the oils and stick blend until a very thin trace.
3
Be careful to not over emulsify the soap - it should be very thin. Split the batch into 5 containers. Three of the containers should contain 400 mL, one should contain 600 mL, and the last should contain 300 mL.
4
Add the dispersed colorants to the 5 containers in the following amounts. To work as quickly as possible, we added the colorants directly into the containers first. Use a whisk to fully incorporate.
- Container A (400 mL): All dispersed Ultramarine Pink
- Container B (400 mL): 2 tsp. dispersed Lavender Mica
- Container C (400 mL): 2 1/2 tsp. dispersed Queen’s Purple Mica
- Container D (600 mL): 2 tsp. dispersed titanium dioxide + 1/2 tsp. dispersed Lavender Mica
- Container E (300 mL): 1 tsp. dispersed Queen’s Purple Mica + 1/8 tsp. dispersed Black Oxide
5
Add the fragrance oil blend proportionally between the containers (it’s okay to eyeball it). Use a whisk to thoroughly incorporate. The soap should still be very thin.
6
Now it’s time to pour. We like to place the mold on a Lazy Susan to help spin the soap. The order in which you pour the colors into the mold is up to you. For this soap, we did not stick to the same color order throughout. We just poured the colors into the mold depending on what looked good. With each pour, keep in mind there is less dark purple soap and more white than the other colors. Pouring the white more frequently between the purple shades gives nice contrast.
Pour a shade of purple soap into one corner of the mold. Count to 3 during the pour to get an even amount. Pour a different color in the opposite corner of the mold, counting to 3. Start pouring various colors into both corners of the mold. As you layer the colors, the soap is pushed toward the center of the mold. Work as quickly as possible during this process, as the soap will continue to thicken up with time. Every now and then, give the colors a whisk to help keep them fluid.
7
Once the colors meet in the center, begin pouring soap into the empty corners of the mold. Every now and then, give the mold a little shake to disperse the soap. Working quickly, continue to pour the soap in the mold until it’s gone.
8
Give the mold a few firm taps on the counter to help eliminate air bubbles and to help the layers of soap settle. Begin to spin the Lazy Susan, stopping it quickly to help give the soap movement. You want the centrifugal force created by the spin and stop movement to move the soap in various directions within the mold. Be careful not to spin too hard, or the soap may spill out of the mold.
9
Continue swirling until you’re happy with the pattern. Be careful to not over-swirl the soap, or the colors will muddle together.
10
Once you’re happy with the swirl, place the divider set into the mold until it reaches the bottom. Begin placing the melt and pour pieces into the corner of each bar. Use your fingers to gently press the embeds into the soap to help them stick.
11
Spray the soap with 99% isopropyl alcohol to help prevent soda ash. The melt and pour embeds can melt if they become too hot, so store this soap in a cool place. Allow them to sit in the dividers for at least 3 days. Because this is a soft recipe and the soap was poured at a thin trace, it may take a little longer to unmold. The water discount helps speed up the process.
After 3 days, check to see if the silicone mold pulls away easily from the soap. If it does, remove the soap from the silicone mold. If it doesn’t, give the soap another day or two to harden. Gently remove the soap from the dividers. To prevent tearing, do not pull the dividers. Push the soap down, or slide the dividers up or down to remove the soap without tearing. Allow the soap to cure for 4-6 weeks, and enjoy!
Tutorial credits
Photographer: Amanda Kerzman