


Candy Corn Soap Project
- Skill Level: Beginner
- Time: 2 hours
- Yield: About 2.5 pounds of soap
Project Description
Layers of yellow, orange, and white soap are poured into the Tall 12" Silicone Loaf Mold. Then, they are cut into triangles and the edges are rounded out with the clean up tool.
These Candy Corn Soaps are scented with classic Pumpkin Spice Fragrance Oil. Just don’t forget the Vanilla Color Stabilizer, or these soaps will discolor tan. In the video you may notice the candy corns are cut upside down. They look cute either way, but cutting the soap as shown in the photos gives you the most accurate appearance.
You will need:
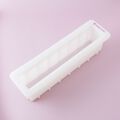
- Tall 12″ Silicone Loaf Mold
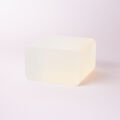
- 32 oz. Clear Melt & Pour Soap Base
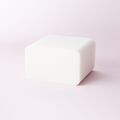
- 16 oz. White Melt & Pour Soap Base
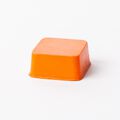
- Perfect Orange Color Block
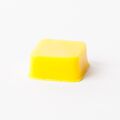
- Fizzy Lemonade Color Block
- 0.6 oz. Pumpkin Spice Fragrance Oil
- 0.6 oz. Vanilla Color Stabilizer
- 99% Isopropyl Alcohol in a Spray Bottle
- Clean Up Tool
Follow these steps:
1
Chop 32 ounces of Clear Melt & Pour Soap Base into small uniform pieces. Then, chop 16 ounces of White Melt & Pour Soap Base into small uniform pieces. Place the following amounts of soap into 3 heat-safe containers.
- Container A: 16 ounces Clear Melt & Pour Soap Base + 0.5 ounces White Melt & Pour Soap Base
- Container B: 16 ounces Clear Melt & Pour Soap Base + 0.5 ounces White Melt & Pour Soap Base
- Container C: 15 ounces White Melt & Pour Soap Base
2
Add a small chunk of Fizzy Lemonade Color Block to container A and melt in the microwave using 30 second bursts. Between each burst, stir the soap to help it melt evenly. If you want the color darker, you can add more of the color block and stir to fully incorporate. Once melted, add 0.2 ounces of Pumpkin Spice Fragrance Oil and 0.2 ounces of Vanilla Color Stabilizer. Stir in completely and pour into the mold. Spritz with alcohol to get rid of bubbles. Allow to fully cool and harden for about 15-20 minutes.
3
Once the yellow layer has hardened and can support a layer on top, add a chunk of Perfect Orange Color Block to container B. Melt the soap in the microwave using 30 second bursts. Between each burst, stir the soap to help it melt evenly.
4
Add 0.2 ounces of Pumpkin Spice Fragrance Oil and 0.2 ounces of Vanilla Color Stabilizer to the orange soap. Stir in completely. Check the temperature of the orange soap. If it’s hotter than 130° F, allow it to cool slightly to prevent melting the layer below. Once it’s the correct temperature, spritz the layer below with alcohol to help the layers stick and pour into the mold. Spritz with alcohol to get rid of bubbles. Allow to fully cool and harden for about 15-20 minutes.
5
Melt the soap in container C using 30 second bursts. Once melted, add 0.2 ounces of Pumpkin Spice Fragrance Oil and 0.2 ounces of Vanilla Color Stabilizer and stir in completely. Check the temperature of the white soap. If it’s over 130° F, allow it to cool slightly to prevent melting the layer below. Once it’s the correct temperature, spritz the layer below with alcohol to help the layers stick and pour the soap into the mold. Spritz with alcohol to get rid of bubbles.
6
Allow the soap to fully cool and harden for at least 3 hours or up to overnight. Remove from the mold and cut into bars about 1″ thick. Then cut the bars into a triangle shapes with the white layer at the top. Repeat this process for the entire loaf.
TIP: Save all the extra soap for embeds for a future batch, or remelt all the soap together for light orange bars.
7
Use the clean up tool to round out the edges of each bar until you’re happy with the look. Enjoy! Wrap them in plastic wrap to prevent glycerin dew.
Tutorial credits
Photographer: Amanda Kerzman
Candy Corn Soap Project
- Skill Level: Beginner
- Time: 2 hours
- Yield: About 2.5 pounds of soap
Project Description
Layers of yellow, orange, and white soap are poured into the Tall 12" Silicone Loaf Mold. Then, they are cut into triangles and the edges are rounded out with the clean up tool.
These Candy Corn Soaps are scented with classic Pumpkin Spice Fragrance Oil. Just don’t forget the Vanilla Color Stabilizer, or these soaps will discolor tan. In the video you may notice the candy corns are cut upside down. They look cute either way, but cutting the soap as shown in the photos gives you the most accurate appearance.
You will need:
- Tall 12″ Silicone Loaf Mold
- 32 oz. Clear Melt & Pour Soap Base
- 16 oz. White Melt & Pour Soap Base
- Perfect Orange Color Block
- Fizzy Lemonade Color Block
- 0.6 oz. Pumpkin Spice Fragrance Oil
- 0.6 oz. Vanilla Color Stabilizer
- 99% Isopropyl Alcohol in a Spray Bottle
- Clean Up Tool
Follow these steps:
1
Chop 32 ounces of Clear Melt & Pour Soap Base into small uniform pieces. Then, chop 16 ounces of White Melt & Pour Soap Base into small uniform pieces. Place the following amounts of soap into 3 heat-safe containers.
- Container A: 16 ounces Clear Melt & Pour Soap Base + 0.5 ounces White Melt & Pour Soap Base
- Container B: 16 ounces Clear Melt & Pour Soap Base + 0.5 ounces White Melt & Pour Soap Base
- Container C: 15 ounces White Melt & Pour Soap Base
2
Add a small chunk of Fizzy Lemonade Color Block to container A and melt in the microwave using 30 second bursts. Between each burst, stir the soap to help it melt evenly. If you want the color darker, you can add more of the color block and stir to fully incorporate. Once melted, add 0.2 ounces of Pumpkin Spice Fragrance Oil and 0.2 ounces of Vanilla Color Stabilizer. Stir in completely and pour into the mold. Spritz with alcohol to get rid of bubbles. Allow to fully cool and harden for about 15-20 minutes.
3
Once the yellow layer has hardened and can support a layer on top, add a chunk of Perfect Orange Color Block to container B. Melt the soap in the microwave using 30 second bursts. Between each burst, stir the soap to help it melt evenly.
4
Add 0.2 ounces of Pumpkin Spice Fragrance Oil and 0.2 ounces of Vanilla Color Stabilizer to the orange soap. Stir in completely. Check the temperature of the orange soap. If it’s hotter than 130° F, allow it to cool slightly to prevent melting the layer below. Once it’s the correct temperature, spritz the layer below with alcohol to help the layers stick and pour into the mold. Spritz with alcohol to get rid of bubbles. Allow to fully cool and harden for about 15-20 minutes.
5
Melt the soap in container C using 30 second bursts. Once melted, add 0.2 ounces of Pumpkin Spice Fragrance Oil and 0.2 ounces of Vanilla Color Stabilizer and stir in completely. Check the temperature of the white soap. If it’s over 130° F, allow it to cool slightly to prevent melting the layer below. Once it’s the correct temperature, spritz the layer below with alcohol to help the layers stick and pour the soap into the mold. Spritz with alcohol to get rid of bubbles.
6
Allow the soap to fully cool and harden for at least 3 hours or up to overnight. Remove from the mold and cut into bars about 1″ thick. Then cut the bars into a triangle shapes with the white layer at the top. Repeat this process for the entire loaf.
TIP: Save all the extra soap for embeds for a future batch, or remelt all the soap together for light orange bars.
7
Use the clean up tool to round out the edges of each bar until you’re happy with the look. Enjoy! Wrap them in plastic wrap to prevent glycerin dew.
Tutorial credits
Photographer: Amanda Kerzman