


Carrot Cold Process Soap
- Skill Level: Advanced
- Time: 2 hours
- Yield: 4 pounds of soap
Project Description
We’ve been having a lot of fun creating food-inspired soap lately. For this recipe, we used a technique similar to the Horse Sculpted Layers project. Thick soap is scooped out of the mold in a particular shape, and the negative space is filled with more soap. Because this carrot shape is not particularly complicated, it’s a great project if you’d like to try the sculpted layer technique for the first time.
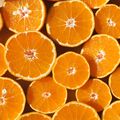
This recipe is a skin-loving blend of squalane Oil, cocoa butter, and olive oil. The base is scented with new Greenhouse Fragrance Oil, and the carrot is scented with Orange 10X Essential Oil. The blend is fresh and bright, and it’s the perfect complement for this rustic yet cheery bar.
If you give this soap a try, pay close attention to the lye instructions. First, a main batch of lye and oil is created. Once the lye cools, 25% of the batch is split into separate containers. The 2 batches are used to create the brown soap and the orange carrot soap.
The reason for making 2 separate batches is the brown soap needs to harden for quite some time. The carrot soap needs to be poured while it’s still fluid. Creating 2 batches allows you to control the consistency of both, and not stress about the orange soap becoming too thick. Once the base is completed, another batch of soap is made to create the piped top. This project does have a few steps, but we think the end result is totally worth it.
You will need:
- Soap Base
- Tall Narrow Wood Loaf Mold
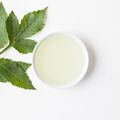
- 2 oz. Squalane Oil (5%)
- 1.2 oz. Castor Oil (3%)
- 2.4 oz. Deodorized Cocoa Butter Wafers (6%)
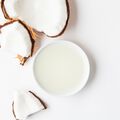
- 10 oz. Coconut Oil (25%)
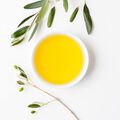
- 13.6 oz. Olive Oil (34%)
- 10.8 oz. Palm Oil (27%)
- 5.6 oz. Sodium Hydroxide Lye
- 13.2 oz. Distilled Water
- 2 oz. Greenhouse Fragrance Oil
- 0.6 oz. Orange 10X Essential Oil
- Racing Stripe Orange Pigment
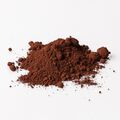
- Brown Oxide
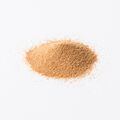
- Walnut Shells
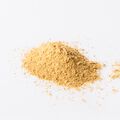
- Orange Peel Powder
- Soap Frosting Top
- 0.7 oz. Squalane Oil (5%)
- 0.4 oz. Castor Oil (3%)
- 0.8 oz. Deodorized Cocoa Butter Wafers (6%)
- 3.3 oz. Coconut Oil (25%)
- 4.4 oz. Olive Oil (34%)
- 3.5 oz. Palm Oil (27%)
- 1.8 oz. Sodium Hydroxide Lye
- 4.3 oz. Distilled Water
- Sodium Hydroxide Lye
- Disposable Frosting Bag
- 1M Frosting Tip
- Green Chrome Pigment Oxide
SCULPTING TOOL PREP: First, you need to create the tool for the carrot shape. Cut a piece of sturdy cardboard into a “T” shape. Then, draw a carrot shape and cut it out. Ours ended up being about 2.5″ long from the bottom of the carrot to the top. Keep in mind that the exact size and shape doesn’t really matter. You can make it larger or smaller if you like. The top sides of the piece of cardboard will rest on top of either side of the mold. This will help keep the tool level throughout the process. If you’d like, you can also include a “lip” on the side (as seen in this tutorial). Because the carrot shape is less complicated and doesn’t need to be as precise, we didn’t include it. Once you’re happy with the size and shape of the carrot, wrap it in clear packaging tape. This helps make it stronger and more soap-proof as it’s moved throughout the mold.
MOLD & TOOL PREP: Line the Tall Narrow Wood Loaf Mold with freezer paper with the shiny side up.
FRAGRANCE PREP: Measure 2 ounces of Greenhouse Fragrance Oil into a small glass container and set aside. Measure 0.6 ounces of 10X Orange Essential Oil into a separate small glass container and set aside.
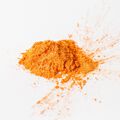
COLORANT PREP: Disperse 1 teaspoon of the brown oxide into 1 tablespoon of sunflower or sweet almond oil (or any other liquid oil). Then disperse 1 teaspoon of Racing Stripe Orange Pigment into 1 tablespoon of lightweight liquid oil. Use a mini mixer to get rid of any clumps. Have 2 tablespoons of walnut shells and 2 teaspoons of orange peel powder nearby. Note: This project was originally made with Nuclear Orange Colorant, which was discontinued. Racing Stripe Orange Mica creates a similar shade but it will look different from the photos below.
SAFETY FIRST: Suit up for safe handling practices. That means goggles, gloves, and long sleeves. Make sure kids, pets, other distractions, and tripping hazards are out of the house or don’t have access to your soaping space. Always soap in a well-ventilated area.
Follow these steps:
MAKE THE BASE
1
Slowly and carefully add 5.6 ounces of lye to 13.2 ounces of distilled water and gently stir until the lye has fully dissolved and the liquid is clear. Set aside to cool. If you’d like a harder bar of soap that releases faster from the mold, you can add sodium lactate to the cooled lye water. Use 1 teaspoon of sodium lactate per pound of oils in the recipe. For this recipe, you’d add 2.5 teaspoons sodium lactate.
2
Melt and combine 2 ounces of squalane oil, 1.2 ounces of castor oil, 2.4 ounces of deodorized cocoa butter wafers, 10 ounces of coconut oil, 13.6 ounces of olive oil, and 10.8 ounces of palm oil (remember to fully melt then mix your entire container of palm oil before portioning) into a large mixing bowl.
3
Once the lye and water have cooled to about 130 degrees F, split off 10 ounces of the oil mixture into a separate container. Then, very carefully (with safety gear on), pour off 4.7 ounces of the lye solution into a separate container. Set these aside – they will be mixed together to form the carrot.
4
Slowly add the large batch of lye solution to the large batch of oils and stick blend until thin trace.
5
Add the 2 ounces of Greenhouse Fragrance Oil and use the stick blender to mix it in.
6
Add all of the dispersed brown oxide and 2 tablespoons of walnut shells. Use a whisk to mix them in thoroughly.
7
The soap should be a thin-medium trace. Give it a few pulses with the stick blender if it’s still quite thin. Pour all of the brown soap into the Tall Narrow Wood Loaf Mold. Tap the mold firmly on the counter to get rid of bubbles.
8
Now, it’s time to wait for the soap to firm and harden. The soap should be firm enough to hold its shape but thin enough to be scraped out smoothly. It’s a little hard to know when you have that perfect texture. We tested every 3 minutes or so by scraping a small amount of the very top of the soap with the carrot tool.
It’s better to start scraping out the extra soap sooner rather than later. If the soap is not thick enough to hold any shape, let it harden for a few more minutes. But, if the soap is too thick, there is no going back. For this recipe, we found waiting about 8-10 minutes was the perfect amount of time to start carving out the carrot. Your soap may require more or less time, so keep an eye on it.
9
Once the soap is an appropriate texture, insert the cardboard carrot shape and begin pulling it through the mold. Place the extra soap into a separate mold to save it. The first few passes with the cardboard will be a little awkward and messy, but that’s okay!
10
Continue sliding the tool through the mold. As you move the cardboard piece down the mold, lift it up and out and discard the excess soap. Continue to move the shaper down the length of the mold until you get about three-fourths of the way. Try your best to keep moving the carrot in the same spot over and over again, otherwise you’ll end up with a very wide carrot.
11
Once you’re almost to the other end, move the shaper in the opposite direction. Keep moving the carrot back and forth until it’s no longer catching soap.
12
Once you’re happy with the shape, it’s time to mix the remaining lye and oils. Pour the lye mixture into the oils and stick blend until you reach a thin trace.
13
Add the 0.6 ounces of 10X Orange Essential Oil and mix in with the stick blender.
14
Add 1.5 teaspoons of dispersed Racing Stripe Orange Pigment and 2 teaspoons orange peel powder. Use a whisk to mix in.
15
Gently pour the orange soap into the negative space in the mold. Continue to pour until it’s level with the top of the brown soap on the sides.
16
We had a little bit of orange soap leftover. We let it thicken slightly, and poured it down the middle of the orange layer to build it up in the center.
17
Use a small spoon to smooth out the orange soap and create a rounded top. Don’t worry about it looking perfect. Set the soap aside while you prep the last batch.
MAKE THE SOAP FROSTING
SAFETY FIRST: Suit up for safe handling practices. That means goggles, gloves, and long sleeves. Make sure kids, pets, other distractions, and tripping hazards are out of the house or don’t have access to your soaping space. Always soap in a well-ventilated area.
FROSTING BAG PREP: Cut off the tip of the disposable frosting bag and insert the frosting tip. Set aside.
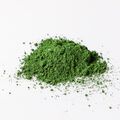
COLORANT PREP: Disperse 1 teaspoon of the Green Chrome Oxide Pigment into 1 tablespoon of sunflower or sweet almond oil (or any other liquid oil). Use a mini mixer to get rid of any clumps
1
Slowly and carefully add 1.8 ounces of lye to 4.3 ounces of distilled water and gently stir until the lye has fully dissolved and the liquid is clear. Set aside to cool. If you’d like a harder bar of soap that releases faster from the mold, you can add sodium lactate to the cooled lye water. Use 1 teaspoon of sodium lactate per pound of oils in the recipe. For this recipe, you’d add 1 teaspoons sodium lactate.
2
Melt and combine 0.7 ounces of squalane oil, 0.4 ounces of castor oil, 0.8 ounces of deodorized cocoa butter wafers, 3.3 ounces of coconut oil, 4.4 ounces of olive oil, and 3.5 ounces of palm oil (remember to fully melt then mix your entire container of palm oil before portioning).
3
Once the lye and water have cooled to about 130 degrees F, slowly add the lye solution to the oils and use the stick blender to mix until they have reached a thin trace.
4
Add 1/2 teaspoon of dispersed Chrome Green Oxide Pigment to the soap, and whisk to mix in. Split off about 200-300 mL of the soap into a separate container. To the larger container of soap, add 1.5 teaspoons more of Chrome Green Oxide Pigment to achieve a darker green. Stick blend both containers of soap until you reach a thick trace.
NOTE: The directions in this recipe have been altered from what is shown in the photos. This was done to decrease the amount of leftover soap.
5
Plop light green soap on top of the brown on both sides of the mold. Then, use a spoon to smooth it out. Don’t worry about it being perfect.
6
Spoon in dollops of the dark green soap and any leftover light green soap into the frosting bag. Twist the end of the bag to close it. Begin piping dollops of soap on top of the orange all the way down the length of the mold.
7
Continue this process 2-3 more times to build height. Once you’re happy with the look, place any leftover green soap into a separate mold.
8
Spritz the top of the soap with 99% isopropyl alcohol to prevent soda ash. We left this soap uncovered at room temperature. Our soap went through gel phase and developed some glycerin rivers, but they actually worked for the dirt design. If you want to prevent gel phase, place the soap in the fridge or freezer for 5-24 hours. Allow the soap to stay in the mold for 2-3 days to harden and unmold. Cut into bars and allow to fully cure for 4-6 weeks. Enjoy.
Tutorial credits
Photographer: Amanda Kerzman, Christina Becker
Carrot Cold Process Soap
- Skill Level: Advanced
- Time: 2 hours
- Yield: 4 pounds of soap
Project Description
We’ve been having a lot of fun creating food-inspired soap lately. For this recipe, we used a technique similar to the Horse Sculpted Layers project. Thick soap is scooped out of the mold in a particular shape, and the negative space is filled with more soap. Because this carrot shape is not particularly complicated, it’s a great project if you’d like to try the sculpted layer technique for the first time.
This recipe is a skin-loving blend of squalane Oil, cocoa butter, and olive oil. The base is scented with new Greenhouse Fragrance Oil, and the carrot is scented with Orange 10X Essential Oil. The blend is fresh and bright, and it’s the perfect complement for this rustic yet cheery bar.
If you give this soap a try, pay close attention to the lye instructions. First, a main batch of lye and oil is created. Once the lye cools, 25% of the batch is split into separate containers. The 2 batches are used to create the brown soap and the orange carrot soap.
The reason for making 2 separate batches is the brown soap needs to harden for quite some time. The carrot soap needs to be poured while it’s still fluid. Creating 2 batches allows you to control the consistency of both, and not stress about the orange soap becoming too thick. Once the base is completed, another batch of soap is made to create the piped top. This project does have a few steps, but we think the end result is totally worth it.
You will need:
- Soap Base
- Tall Narrow Wood Loaf Mold
- 2 oz. Squalane Oil (5%)
- 1.2 oz. Castor Oil (3%)
- 2.4 oz. Deodorized Cocoa Butter Wafers (6%)
- 10 oz. Coconut Oil (25%)
- 13.6 oz. Olive Oil (34%)
- 10.8 oz. Palm Oil (27%)
- 5.6 oz. Sodium Hydroxide Lye
- 13.2 oz. Distilled Water
- 2 oz. Greenhouse Fragrance Oil
- 0.6 oz. Orange 10X Essential Oil
- Racing Stripe Orange Pigment
- Brown Oxide
- Walnut Shells
- Orange Peel Powder
- Soap Frosting Top
- 0.7 oz. Squalane Oil (5%)
- 0.4 oz. Castor Oil (3%)
- 0.8 oz. Deodorized Cocoa Butter Wafers (6%)
- 3.3 oz. Coconut Oil (25%)
- 4.4 oz. Olive Oil (34%)
- 3.5 oz. Palm Oil (27%)
- 1.8 oz. Sodium Hydroxide Lye
- 4.3 oz. Distilled Water
- Sodium Hydroxide Lye
- Disposable Frosting Bag
- 1M Frosting Tip
- Green Chrome Pigment Oxide
SCULPTING TOOL PREP: First, you need to create the tool for the carrot shape. Cut a piece of sturdy cardboard into a “T” shape. Then, draw a carrot shape and cut it out. Ours ended up being about 2.5″ long from the bottom of the carrot to the top. Keep in mind that the exact size and shape doesn’t really matter. You can make it larger or smaller if you like. The top sides of the piece of cardboard will rest on top of either side of the mold. This will help keep the tool level throughout the process. If you’d like, you can also include a “lip” on the side (as seen in this tutorial). Because the carrot shape is less complicated and doesn’t need to be as precise, we didn’t include it. Once you’re happy with the size and shape of the carrot, wrap it in clear packaging tape. This helps make it stronger and more soap-proof as it’s moved throughout the mold.
MOLD & TOOL PREP: Line the Tall Narrow Wood Loaf Mold with freezer paper with the shiny side up.
FRAGRANCE PREP: Measure 2 ounces of Greenhouse Fragrance Oil into a small glass container and set aside. Measure 0.6 ounces of 10X Orange Essential Oil into a separate small glass container and set aside.
COLORANT PREP: Disperse 1 teaspoon of the brown oxide into 1 tablespoon of sunflower or sweet almond oil (or any other liquid oil). Then disperse 1 teaspoon of Racing Stripe Orange Pigment into 1 tablespoon of lightweight liquid oil. Use a mini mixer to get rid of any clumps. Have 2 tablespoons of walnut shells and 2 teaspoons of orange peel powder nearby. Note: This project was originally made with Nuclear Orange Colorant, which was discontinued. Racing Stripe Orange Mica creates a similar shade but it will look different from the photos below.
SAFETY FIRST: Suit up for safe handling practices. That means goggles, gloves, and long sleeves. Make sure kids, pets, other distractions, and tripping hazards are out of the house or don’t have access to your soaping space. Always soap in a well-ventilated area.
Follow these steps:
MAKE THE BASE
1
Slowly and carefully add 5.6 ounces of lye to 13.2 ounces of distilled water and gently stir until the lye has fully dissolved and the liquid is clear. Set aside to cool. If you’d like a harder bar of soap that releases faster from the mold, you can add sodium lactate to the cooled lye water. Use 1 teaspoon of sodium lactate per pound of oils in the recipe. For this recipe, you’d add 2.5 teaspoons sodium lactate.
2
Melt and combine 2 ounces of squalane oil, 1.2 ounces of castor oil, 2.4 ounces of deodorized cocoa butter wafers, 10 ounces of coconut oil, 13.6 ounces of olive oil, and 10.8 ounces of palm oil (remember to fully melt then mix your entire container of palm oil before portioning) into a large mixing bowl.
3
Once the lye and water have cooled to about 130 degrees F, split off 10 ounces of the oil mixture into a separate container. Then, very carefully (with safety gear on), pour off 4.7 ounces of the lye solution into a separate container. Set these aside – they will be mixed together to form the carrot.
4
Slowly add the large batch of lye solution to the large batch of oils and stick blend until thin trace.
5
Add the 2 ounces of Greenhouse Fragrance Oil and use the stick blender to mix it in.
6
Add all of the dispersed brown oxide and 2 tablespoons of walnut shells. Use a whisk to mix them in thoroughly.
7
The soap should be a thin-medium trace. Give it a few pulses with the stick blender if it’s still quite thin. Pour all of the brown soap into the Tall Narrow Wood Loaf Mold. Tap the mold firmly on the counter to get rid of bubbles.
8
Now, it’s time to wait for the soap to firm and harden. The soap should be firm enough to hold its shape but thin enough to be scraped out smoothly. It’s a little hard to know when you have that perfect texture. We tested every 3 minutes or so by scraping a small amount of the very top of the soap with the carrot tool.
It’s better to start scraping out the extra soap sooner rather than later. If the soap is not thick enough to hold any shape, let it harden for a few more minutes. But, if the soap is too thick, there is no going back. For this recipe, we found waiting about 8-10 minutes was the perfect amount of time to start carving out the carrot. Your soap may require more or less time, so keep an eye on it.
9
Once the soap is an appropriate texture, insert the cardboard carrot shape and begin pulling it through the mold. Place the extra soap into a separate mold to save it. The first few passes with the cardboard will be a little awkward and messy, but that’s okay!
10
Continue sliding the tool through the mold. As you move the cardboard piece down the mold, lift it up and out and discard the excess soap. Continue to move the shaper down the length of the mold until you get about three-fourths of the way. Try your best to keep moving the carrot in the same spot over and over again, otherwise you’ll end up with a very wide carrot.
11
Once you’re almost to the other end, move the shaper in the opposite direction. Keep moving the carrot back and forth until it’s no longer catching soap.
12
Once you’re happy with the shape, it’s time to mix the remaining lye and oils. Pour the lye mixture into the oils and stick blend until you reach a thin trace.
13
Add the 0.6 ounces of 10X Orange Essential Oil and mix in with the stick blender.
14
Add 1.5 teaspoons of dispersed Racing Stripe Orange Pigment and 2 teaspoons orange peel powder. Use a whisk to mix in.
15
Gently pour the orange soap into the negative space in the mold. Continue to pour until it’s level with the top of the brown soap on the sides.
16
We had a little bit of orange soap leftover. We let it thicken slightly, and poured it down the middle of the orange layer to build it up in the center.
17
Use a small spoon to smooth out the orange soap and create a rounded top. Don’t worry about it looking perfect. Set the soap aside while you prep the last batch.
MAKE THE SOAP FROSTING
SAFETY FIRST: Suit up for safe handling practices. That means goggles, gloves, and long sleeves. Make sure kids, pets, other distractions, and tripping hazards are out of the house or don’t have access to your soaping space. Always soap in a well-ventilated area.
FROSTING BAG PREP: Cut off the tip of the disposable frosting bag and insert the frosting tip. Set aside.
COLORANT PREP: Disperse 1 teaspoon of the Green Chrome Oxide Pigment into 1 tablespoon of sunflower or sweet almond oil (or any other liquid oil). Use a mini mixer to get rid of any clumps
1
Slowly and carefully add 1.8 ounces of lye to 4.3 ounces of distilled water and gently stir until the lye has fully dissolved and the liquid is clear. Set aside to cool. If you’d like a harder bar of soap that releases faster from the mold, you can add sodium lactate to the cooled lye water. Use 1 teaspoon of sodium lactate per pound of oils in the recipe. For this recipe, you’d add 1 teaspoons sodium lactate.
2
Melt and combine 0.7 ounces of squalane oil, 0.4 ounces of castor oil, 0.8 ounces of deodorized cocoa butter wafers, 3.3 ounces of coconut oil, 4.4 ounces of olive oil, and 3.5 ounces of palm oil (remember to fully melt then mix your entire container of palm oil before portioning).
3
Once the lye and water have cooled to about 130 degrees F, slowly add the lye solution to the oils and use the stick blender to mix until they have reached a thin trace.
4
Add 1/2 teaspoon of dispersed Chrome Green Oxide Pigment to the soap, and whisk to mix in. Split off about 200-300 mL of the soap into a separate container. To the larger container of soap, add 1.5 teaspoons more of Chrome Green Oxide Pigment to achieve a darker green. Stick blend both containers of soap until you reach a thick trace.
NOTE: The directions in this recipe have been altered from what is shown in the photos. This was done to decrease the amount of leftover soap.
5
Plop light green soap on top of the brown on both sides of the mold. Then, use a spoon to smooth it out. Don’t worry about it being perfect.
6
Spoon in dollops of the dark green soap and any leftover light green soap into the frosting bag. Twist the end of the bag to close it. Begin piping dollops of soap on top of the orange all the way down the length of the mold.
7
Continue this process 2-3 more times to build height. Once you’re happy with the look, place any leftover green soap into a separate mold.
8
Spritz the top of the soap with 99% isopropyl alcohol to prevent soda ash. We left this soap uncovered at room temperature. Our soap went through gel phase and developed some glycerin rivers, but they actually worked for the dirt design. If you want to prevent gel phase, place the soap in the fridge or freezer for 5-24 hours. Allow the soap to stay in the mold for 2-3 days to harden and unmold. Cut into bars and allow to fully cure for 4-6 weeks. Enjoy.
Tutorial credits
Photographer: Amanda Kerzman, Christina Becker