


Relaxing Lavender Bath Bombs
- Skill Level: Intermediate
- Time: 1 hour
- Yield: 7 bath bombs
Project Description
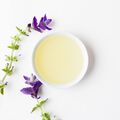
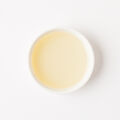
The dried lavender on top is a simple finishing touch that makes these bath bombs perfectly giftable. Borage oil is lightweight and has amazing skin-loving properties. To help it mix into your bath, we added a bit of polysorbate 80. It’s an emulsifier that helps the oil mix into the water rather than pooling on top. It’s an optional ingredient, but we love the way it makes the water feel.
Need additional bath bomb supplies? Check out these bath bomb making kits.
You will need:
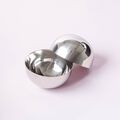
- Stainless Steel Bath Bomb Mold
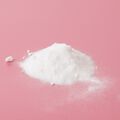
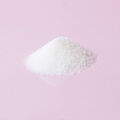
- 32 oz. Baking Soda
- 16 oz. Citric Acid
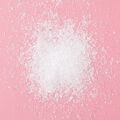
- 4 oz. Extra Fine Epsom Salt
- 2 oz. Borage Oil
- 0.7 oz. Polysorbate 80
- 0.3 oz. Lavender 40/42 Essential Oil
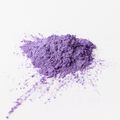
- About 1/4 tsp. Lavender Mica
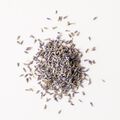
- Dried Lavender
- Witch Hazel in a Spray Bottle
Follow these steps:
1
In a small container, add 2 ounces of borage oil, 0.7 ounces of polysorbate 80, 0.3 ounces of lavender 40/42 essential oil, and about 1/4 teaspoon of lavender mica. Use a spoon to thoroughly mix all the ingredients together.
2
In a large container, add 32 ounces of baking soda and 16 ounces of citric acid. To get rid of clumps, push the powder through a sifter or break them up with your fingers. Citric acid has a tendency to take off nail polish, so wear gloves to protect your manicure. Add 4 ounces of Epsom salt. Thoroughly stir the ingredients together.
3
Add the oil to the dry ingredients. Use your hands to thoroughly mix the dry and wet ingredients together.
4
Check the consistency of the bath bomb mixture. The perfect consistency is similar to wet sand that holds its shape when squeezed. If it’s too dry, use one hand to spritz the mixture with witch hazel and one to mix. Continue spritzing until the mixture holds its shape.
5
Place a pinch of dried lavender in the center of one half of the Stainless Steel Bath Bomb Mold.
6
Fill both halves of the mold with bath bomb mixture and press it into the molds. You don’t need to press too hard – it helps the bath bomb halves stick together if some of the mixture is loose on top. Once both halves are full, press them firmly together.
7
Very gently, pull the top half of the mold away while twisting. It can be a little tricky to get the bath bombs to stick together, but practice makes perfect. To safely unmold the other half, place the top of the mold back on, flip the bath bomb over, and release the other side by twisting and pulling away gently.
8
Place the bath bomb on the counter or in a container that will hold them in place without rolling away. We used the 6 Cavity Silicone Dome Mold. You can also use a large muffin tin or a soft surface like foam. Allow the bath bombs to fully dry and harden overnight. Once you’re ready to use, place in hot bath water and enjoy!
Tutorial credits
Photographer: Amanda Kerzman
Relaxing Lavender Bath Bombs
- Skill Level: Intermediate
- Time: 1 hour
- Yield: 7 bath bombs
Project Description
The dried lavender on top is a simple finishing touch that makes these bath bombs perfectly giftable. Borage oil is lightweight and has amazing skin-loving properties. To help it mix into your bath, we added a bit of polysorbate 80. It’s an emulsifier that helps the oil mix into the water rather than pooling on top. It’s an optional ingredient, but we love the way it makes the water feel.
Need additional bath bomb supplies? Check out these bath bomb making kits.
You will need:
- Stainless Steel Bath Bomb Mold
- 32 oz. Baking Soda
- 16 oz. Citric Acid
- 4 oz. Extra Fine Epsom Salt
- 2 oz. Borage Oil
- 0.7 oz. Polysorbate 80
- 0.3 oz. Lavender 40/42 Essential Oil
- About 1/4 tsp. Lavender Mica
- Dried Lavender
- Witch Hazel in a Spray Bottle
Follow these steps:
1
In a small container, add 2 ounces of borage oil, 0.7 ounces of polysorbate 80, 0.3 ounces of lavender 40/42 essential oil, and about 1/4 teaspoon of lavender mica. Use a spoon to thoroughly mix all the ingredients together.
2
In a large container, add 32 ounces of baking soda and 16 ounces of citric acid. To get rid of clumps, push the powder through a sifter or break them up with your fingers. Citric acid has a tendency to take off nail polish, so wear gloves to protect your manicure. Add 4 ounces of Epsom salt. Thoroughly stir the ingredients together.
3
Add the oil to the dry ingredients. Use your hands to thoroughly mix the dry and wet ingredients together.
4
Check the consistency of the bath bomb mixture. The perfect consistency is similar to wet sand that holds its shape when squeezed. If it’s too dry, use one hand to spritz the mixture with witch hazel and one to mix. Continue spritzing until the mixture holds its shape.
5
Place a pinch of dried lavender in the center of one half of the Stainless Steel Bath Bomb Mold.
6
Fill both halves of the mold with bath bomb mixture and press it into the molds. You don’t need to press too hard – it helps the bath bomb halves stick together if some of the mixture is loose on top. Once both halves are full, press them firmly together.
7
Very gently, pull the top half of the mold away while twisting. It can be a little tricky to get the bath bombs to stick together, but practice makes perfect. To safely unmold the other half, place the top of the mold back on, flip the bath bomb over, and release the other side by twisting and pulling away gently.
8
Place the bath bomb on the counter or in a container that will hold them in place without rolling away. We used the 6 Cavity Silicone Dome Mold. You can also use a large muffin tin or a soft surface like foam. Allow the bath bombs to fully dry and harden overnight. Once you’re ready to use, place in hot bath water and enjoy!
Tutorial credits
Photographer: Amanda Kerzman