


Heart the Rainbow Soap Project
- Skill Level: Intermediate
- Time: 2 hours
- Yield: About 5 pounds of soap
Project Description
The base of this soap is lightened with titanium dioxide, which makes each mica line really pop. While this project does have a lot of layers, Apple Sage Fragrance Oil gives you plenty of time to work. You also don't need to worry about making each one straight - we purposefully allowed the soap to reach a medium to thick trace to help create interesting wavy lines.
The first step is to create the heart embeds. Clear soap is colored with Red Mica and poured into the Mini Heart Silicone Column Mold. Once hardened, the embed is cut into small hearts. When creating each mica line, take care to completely cover the soap evenly. Just be careful to not add too much color. This can cause the soap to separate. If the mica begins to look dry and is not being wet by the soap, that's when it's time to stop. The powder duster is a great tool to have for this process. It applies a thin and even layer, and it's small enough to help place the mica where you need it.
We recommend cutting this loaf on its side to prevent drag marks from the mica lines. We used the Soap Shaver to slice a thin layer from the sides so you can see the lines clearly.
You will need:
- Embeds:
- Mini Heart Silicone Column Mold
- 4 oz. Clear Melt and Pour Soap Base
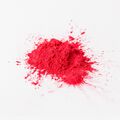
- Red Mica
- Base:
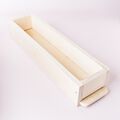
- 5 lb. Wood Mold with Sliding Bottom
- Silicone Liner for 5 lb. Wood Mold
- 54 oz. Lots of Lather Quick Mix
- 7.7 oz. Sodium Hydroxide Lye
- 15.5 oz. Distilled Water (10% water discount)
- 3.5 tsp. Sodium Lactate (optional)
- 3 oz. Apple Sage Fragrance Oil
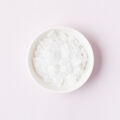
- Titanium Dioxide
- Red Mica
- Sunset Orange Mica
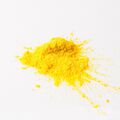
- Yellow Mica
- Kermit Green Mica
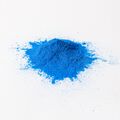
- Blue Mica
- Queen's Purple Mica
- Note: This project was originally made with Kelly Green Mica
Follow these steps:
MAKE THE EMBEDS
1
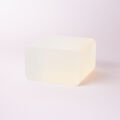
Chop 4 ounces of Clear Melt and Pour Soap Base into small uniform cubes. Place them in a heat-safe container and melt in the microwave using 10-15 second bursts. Stir in about 1/8 teaspoon of Red MIca until there are no clumps.
2
Pour the soap into the Mini Heart Silicone Column Mold. Place the mold in a vertical container, or place it against a wall to stand vertically. Allow the soap to fully harden and cool for about 2 hours. Remove from the mold and cut into small, thin hearts for the top. Set aside.
MAKE THE BASE
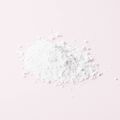
COLORANT PREP: Disperse 3 teaspoons of titanium dioxide into a small container along with 3 tablespoons of lightweight liquid oil. Use a mini mixer to get rid of clumps. Have all the micas nearby to create the layers, along with a powder duster or fine mesh strainer.
SAFETY FIRST: Suit up for safe handling practices. That means goggles, gloves, and long sleeves. Make sure kids, pets, other distractions, and tripping hazards are out of the house or don’t have access to your space. Always make soap in a well-ventilated area.
1
Slowly and carefully add 7.7 ounces of lye to 15.5 ounces of distilled water. Gently stir until the lye has fully dissolved. Set it aside to cool. Optional: Add 3.5 teaspoons of sodium lactate to help the bars harden more quickly.
2
Place the entire 54 ounce bag of Lots of Lather Quick Mix in the microwave and heat until the oils are no longer cloudy. Shake the bag thoroughly and pour 54 ounces into a large mixing bowl. Once the lye water and oils around 100-120° F (and are ideally within 10 degrees of each other), add the lye water to the oils and stick blend until the mixture reaches a thin trace.
3
Add all of the measured Apple Sage Fragrance Oil and 3 tablespoons of dispersed titanium dioxide. Use the stick blender to stir and pulse in short bursts. Continue to until the soap is a thin to medium trace, which looks like thin pudding.
4
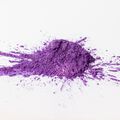
Pour a small layer of soap into the mold, just enough to cover the bottom. Use a spoon to spread the layer and possibly create a little texture. Place about 1 teaspoon of Queen's Purple Mica into the powder duster and apply an even layer of mica on the entire layer of soap. You want the soap to be completely covered, but stop once the mica begins to look dry.
5
Use a spatula to plop soap on top of the purple mica line. Don't worry too much if it distrupts the layer below a little bit. Use a smaller spoon to spread the white soap until it evenly covers the purple mica, and then create subtle texture.
6
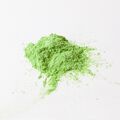
Cover the soap completely with an even layer of Blue Mica, then spoon dollops of white soap on top. Use a small spoon to cover evenly and create texture. Repeat this layering process with Kelly Green, Yellow Mica, and finally Sunset Orange Mica. Tip: During this process, the soap will become slightly thicker. Every now and then, whisk the batter to keep it fluid. Every other layer, tap the mold firmly on the counter to prevent air pockets in the layers.
7
Cover the orange mica line with the last bit of white soap. Use a spoon to create texture on top. Place the heart embeds into the soap on the side. Keep in mind where you'd like to cut the bars, and place the hearts accordingly.
8
Spritz the top of the soap with 99% isopropyl alcohol to prevent soda ash. If you'd like, place the mold on a heating pad for 1-2 hours on medium to insulate - this will help it unmold faster.
9
Allow the soap to sit in the mold for 2-3 days and then remove. Lay the loaf on its side and cut down to prevent streaks. We also used a Soap Shaver to shave a thin layer of soap from the sides of each bar. Allow the bars to cure for 4-6 weeks and enjoy!
Tutorial credits
Photographer: Amanda Kerzman
Heart the Rainbow Soap Project
- Skill Level: Intermediate
- Time: 2 hours
- Yield: About 5 pounds of soap
Project Description
The base of this soap is lightened with titanium dioxide, which makes each mica line really pop. While this project does have a lot of layers, Apple Sage Fragrance Oil gives you plenty of time to work. You also don't need to worry about making each one straight - we purposefully allowed the soap to reach a medium to thick trace to help create interesting wavy lines.
The first step is to create the heart embeds. Clear soap is colored with Red Mica and poured into the Mini Heart Silicone Column Mold. Once hardened, the embed is cut into small hearts. When creating each mica line, take care to completely cover the soap evenly. Just be careful to not add too much color. This can cause the soap to separate. If the mica begins to look dry and is not being wet by the soap, that's when it's time to stop. The powder duster is a great tool to have for this process. It applies a thin and even layer, and it's small enough to help place the mica where you need it.
We recommend cutting this loaf on its side to prevent drag marks from the mica lines. We used the Soap Shaver to slice a thin layer from the sides so you can see the lines clearly.
You will need:
- Embeds:
- Mini Heart Silicone Column Mold
- 4 oz. Clear Melt and Pour Soap Base
- Red Mica
- Base:
- 5 lb. Wood Mold with Sliding Bottom
- Silicone Liner for 5 lb. Wood Mold
- 54 oz. Lots of Lather Quick Mix
- 7.7 oz. Sodium Hydroxide Lye
- 15.5 oz. Distilled Water (10% water discount)
- 3.5 tsp. Sodium Lactate (optional)
- 3 oz. Apple Sage Fragrance Oil
- Titanium Dioxide
- Red Mica
- Sunset Orange Mica
- Yellow Mica
- Kermit Green Mica
- Blue Mica
- Queen's Purple Mica
- Note: This project was originally made with Kelly Green Mica
Follow these steps:
MAKE THE EMBEDS
1
Chop 4 ounces of Clear Melt and Pour Soap Base into small uniform cubes. Place them in a heat-safe container and melt in the microwave using 10-15 second bursts. Stir in about 1/8 teaspoon of Red MIca until there are no clumps.
2
Pour the soap into the Mini Heart Silicone Column Mold. Place the mold in a vertical container, or place it against a wall to stand vertically. Allow the soap to fully harden and cool for about 2 hours. Remove from the mold and cut into small, thin hearts for the top. Set aside.
MAKE THE BASE
COLORANT PREP: Disperse 3 teaspoons of titanium dioxide into a small container along with 3 tablespoons of lightweight liquid oil. Use a mini mixer to get rid of clumps. Have all the micas nearby to create the layers, along with a powder duster or fine mesh strainer.
SAFETY FIRST: Suit up for safe handling practices. That means goggles, gloves, and long sleeves. Make sure kids, pets, other distractions, and tripping hazards are out of the house or don’t have access to your space. Always make soap in a well-ventilated area.
1
Slowly and carefully add 7.7 ounces of lye to 15.5 ounces of distilled water. Gently stir until the lye has fully dissolved. Set it aside to cool. Optional: Add 3.5 teaspoons of sodium lactate to help the bars harden more quickly.
2
Place the entire 54 ounce bag of Lots of Lather Quick Mix in the microwave and heat until the oils are no longer cloudy. Shake the bag thoroughly and pour 54 ounces into a large mixing bowl. Once the lye water and oils around 100-120° F (and are ideally within 10 degrees of each other), add the lye water to the oils and stick blend until the mixture reaches a thin trace.
3
Add all of the measured Apple Sage Fragrance Oil and 3 tablespoons of dispersed titanium dioxide. Use the stick blender to stir and pulse in short bursts. Continue to until the soap is a thin to medium trace, which looks like thin pudding.
4
Pour a small layer of soap into the mold, just enough to cover the bottom. Use a spoon to spread the layer and possibly create a little texture. Place about 1 teaspoon of Queen's Purple Mica into the powder duster and apply an even layer of mica on the entire layer of soap. You want the soap to be completely covered, but stop once the mica begins to look dry.
5
Use a spatula to plop soap on top of the purple mica line. Don't worry too much if it distrupts the layer below a little bit. Use a smaller spoon to spread the white soap until it evenly covers the purple mica, and then create subtle texture.
6
Cover the soap completely with an even layer of Blue Mica, then spoon dollops of white soap on top. Use a small spoon to cover evenly and create texture. Repeat this layering process with Kelly Green, Yellow Mica, and finally Sunset Orange Mica. Tip: During this process, the soap will become slightly thicker. Every now and then, whisk the batter to keep it fluid. Every other layer, tap the mold firmly on the counter to prevent air pockets in the layers.
7
Cover the orange mica line with the last bit of white soap. Use a spoon to create texture on top. Place the heart embeds into the soap on the side. Keep in mind where you'd like to cut the bars, and place the hearts accordingly.
8
Spritz the top of the soap with 99% isopropyl alcohol to prevent soda ash. If you'd like, place the mold on a heating pad for 1-2 hours on medium to insulate - this will help it unmold faster.
9
Allow the soap to sit in the mold for 2-3 days and then remove. Lay the loaf on its side and cut down to prevent streaks. We also used a Soap Shaver to shave a thin layer of soap from the sides of each bar. Allow the bars to cure for 4-6 weeks and enjoy!
Tutorial credits
Photographer: Amanda Kerzman