

Frosted Fir Layered Candle Project
- Skill Level: Advanced
- Time: 2 hours
- Yield: 4 candles
Project Description
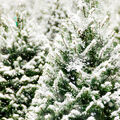
These Frosted Fir Layered Candles are perfect for holiday gifts. They feature a beautiful ombre design, which is created by layering a combination of soy and coconut wax. Each layer contains decreasing amounts of Sage Green Candle Dye Flakes. They're scented with Frosted Fir Fragrance Oil, which has notes of wild berry, silver fir, spruce, and musk.
If you've never made candles before, we recommend reading the How to Make Soy Wax Candles article first. Start with a few easy recipes before this one. Then, check out How to Layer Candles for tips and troubleshooting.
Want more candle making supplies? Check out these DIY candle making recipes.
You will need:
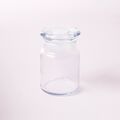
- Four 4 oz. Lidded Glass Jars
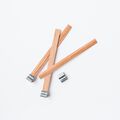
- 4 Short and Narrow Wooden Wicks
- 9 oz. Golden Wax 464
- 3.9 oz. Coconut Wax
- Sage Green Dye Flakes
- 1.2 oz. Frosted Fir Fragrance Oil
Follow these steps:
1
Place a half-filled pot of water on the stove, bring it to a low simmer, and nest a pouring pitcher or other heat-safe container inside. Add 3 ounces of Golden Wax 464 and 1.3 ounces of coconut wax and allow to melt. Add approximately 1/2 teaspoon of Sage Green Candle Dye Flakes and gently stir to combine.
2
Weigh out 0.4 ounces of Frosted Fir Fragrance Oil into a glass container. Once the wax reaches 185-190° F, remove it from the heat and slowly stir in the fragrance for 1-2 minutes to fully incorporate. Set aside until it cools to 150° F.
3
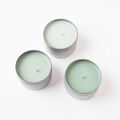
Carefully pour the green wax into each candle container. Each one should have about 1.4 ounces of wax for the first layer - pour on a scale to be as precise as possible. Place the wooden wick into its metal holder and gently place the wick in the center of the container. Set aside to cool. Note: Adding the wick after pouring the first layer prevents drips on the side of the container. If you prefer, you can add your wick first with a wick sticker.
4
After the first layer has cooled for about 15-20 minutes, place another 3 ounces of Golden Wax 464 and 1.3 ounces of coconut wax into the heat-safe container. Allow to melt slightly and add approximately 1/4 teaspoon of Sage Green Candle Dye Flakes. Stir gently to combine.
5
Weigh out 0.4 ounces of Frosted Fir Fragrance Oil. Once the wax reaches 185-190° F, remove it from the heat and slowly stir in the fragrance for 1-2 minutes to fully incorporate. Set aside until it cools to 150° F.
6
Check the first layer of wax in each candle. You want it to be fully opaque and the glass should be at room temperature. We found this was the best temperature to prevent wax from pulling away from the container. Carefully pour the second layer of wax into each container, avoiding the sides to create a clean line. Set aside to cool.
7
After the second layer has cooled for about 15-20 minutes, place another 3 ounces of Golden Wax 464 and1.3 ounces of coconut wax into the double boiler. Allow to melt slightly and add approximately 1/8 teaspoon of Sage Green Candle Dye Flakes. Stir in gently to combine.
8
Weigh out 0.4 ounces of Frosted Fir Fragrance Oil into a glass container. Once the wax reaches 185° F, remove it from the heat and slowly stir in the fragrance for 1-2 minutes to fully incorporate. Set aside until it cools to 150° F.
9
Repeat step 6. We recommend allowing the candles to cool for a full 48 hours before burning. Trim the wick to 1/4" before lighting - nail clippers work well. Enjoy!
Tutorial credits
Photographer: Amanda Kerzman
Frosted Fir Layered Candle Project
- Skill Level: Advanced
- Time: 2 hours
- Yield: 4 candles
Project Description
These Frosted Fir Layered Candles are perfect for holiday gifts. They feature a beautiful ombre design, which is created by layering a combination of soy and coconut wax. Each layer contains decreasing amounts of Sage Green Candle Dye Flakes. They're scented with Frosted Fir Fragrance Oil, which has notes of wild berry, silver fir, spruce, and musk.
If you've never made candles before, we recommend reading the How to Make Soy Wax Candles article first. Start with a few easy recipes before this one. Then, check out How to Layer Candles for tips and troubleshooting.
Want more candle making supplies? Check out these DIY candle making recipes.
You will need:
- Four 4 oz. Lidded Glass Jars
- 4 Short and Narrow Wooden Wicks
- 9 oz. Golden Wax 464
- 3.9 oz. Coconut Wax
- Sage Green Dye Flakes
- 1.2 oz. Frosted Fir Fragrance Oil
Follow these steps:
1
Place a half-filled pot of water on the stove, bring it to a low simmer, and nest a pouring pitcher or other heat-safe container inside. Add 3 ounces of Golden Wax 464 and 1.3 ounces of coconut wax and allow to melt. Add approximately 1/2 teaspoon of Sage Green Candle Dye Flakes and gently stir to combine.
2
Weigh out 0.4 ounces of Frosted Fir Fragrance Oil into a glass container. Once the wax reaches 185-190° F, remove it from the heat and slowly stir in the fragrance for 1-2 minutes to fully incorporate. Set aside until it cools to 150° F.
3
Carefully pour the green wax into each candle container. Each one should have about 1.4 ounces of wax for the first layer - pour on a scale to be as precise as possible. Place the wooden wick into its metal holder and gently place the wick in the center of the container. Set aside to cool. Note: Adding the wick after pouring the first layer prevents drips on the side of the container. If you prefer, you can add your wick first with a wick sticker.
4
After the first layer has cooled for about 15-20 minutes, place another 3 ounces of Golden Wax 464 and 1.3 ounces of coconut wax into the heat-safe container. Allow to melt slightly and add approximately 1/4 teaspoon of Sage Green Candle Dye Flakes. Stir gently to combine.
5
Weigh out 0.4 ounces of Frosted Fir Fragrance Oil. Once the wax reaches 185-190° F, remove it from the heat and slowly stir in the fragrance for 1-2 minutes to fully incorporate. Set aside until it cools to 150° F.
6
Check the first layer of wax in each candle. You want it to be fully opaque and the glass should be at room temperature. We found this was the best temperature to prevent wax from pulling away from the container. Carefully pour the second layer of wax into each container, avoiding the sides to create a clean line. Set aside to cool.
7
After the second layer has cooled for about 15-20 minutes, place another 3 ounces of Golden Wax 464 and1.3 ounces of coconut wax into the double boiler. Allow to melt slightly and add approximately 1/8 teaspoon of Sage Green Candle Dye Flakes. Stir in gently to combine.
8
Weigh out 0.4 ounces of Frosted Fir Fragrance Oil into a glass container. Once the wax reaches 185° F, remove it from the heat and slowly stir in the fragrance for 1-2 minutes to fully incorporate. Set aside until it cools to 150° F.
9
Repeat step 6. We recommend allowing the candles to cool for a full 48 hours before burning. Trim the wick to 1/4" before lighting - nail clippers work well. Enjoy!
Tutorial credits
Photographer: Amanda Kerzman