


Succulent Candle Project
- Skill Level: Intermediate
- Time: 2 hours
- Yield: 4 candles
Project Description
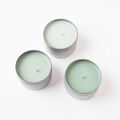
Created by London of Particle Goods, this Succulent Candle is almost too cute to burn! But it smells so good, you'll want to use it over and over again.
The project is a two-part process. First, the succulent pieces are made in the 4 Cavity Succulent Silicone Mold. After lots of testing, London found that mixing white beeswax with Nature Wax C-3 created a firm yet moldable texture that came out of the mold easily. A hole is poked through each embed and the wick is threaded through.
We recommend getting a few basic soy candles under your belt before attempting this project. If you're new to this, read the How to Make Soy Wax Candles article by London - it's full of everything you need to know including pour temperatures, fragrance usage rates, and more.
Want more candle making supplies? Check out these DIY candle making recipes.
You will need:
- Succulents:
- 4 Cavity Succulent Silicone Mold
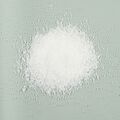
- 8.2 oz. Nature Wax C-3
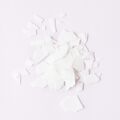
- 2.1 oz. White Beeswax
- 0.8 oz. Cactus Flower Fragrance Oil
- Sage Green Wax Dye Flakes
- Base:
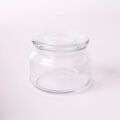
- Four 8 oz. Lidded Glass Jars
- Four HTP 1212 Wicks
- 36 oz. Nature Wax C-3
- 2.8 oz. Cactus Flower Fragrance Oil
Follow these steps:
1
Place a half-filled pot of water on the stove, bring it to a low simmer, and nest your pouring pitcher (or other heat-safe container) inside. Weigh out 8.2 ounces of Nature Wax C-3 and 2.1 ounces beeswax and combine in the pouring pitcher. Add 2 generous pinches of Sage Green Wax Dye Flakes just as the wax has melted and stir to incorporate. While the wax heats to 185° F, prep your fragrance.
2
Measure 0.8 ounces of Cactus Flower Fragrance Oil into a glass container. When the wax reaches 185° F, remove it from heat and mix in the fragrance. Stir slowly and gently for 1-2 minutes to fully incorporate. Once the wax is at 160° F, pour into each cavity of the Succulent Silicone Mold. Set aside to cool. Tip: To avoid the frosting effect on the surface of the finished succulent, preheat the silicone mold with a heat gun or on the lowest oven setting for about 3-5 minutes (just until slightly warm to the touch). This helps create a smooth surface and allows the molded wax to pop out easier.
3
Once the wax in the molds looks fully opaque (about 1-2 hours), very gently use the sharp end of a skewer to poke a hole down through the center of the succulent for the wick. Set aside to continue cooling.
4
Weigh out 36 ounces of Nature Wax C-3 and place it in the pouring pitcher. Bring the water to a low simmer and start to melt. Measure 2.6 ounces of Cactus Flower Fragrance Oil into a glass container.
5
Once the wax reaches 185° F, remove from the heat and slowly stir in the fragrance oil for 1-2 minutes.
6
Once the wax has cooled to 145-150° F, pour it slowly into the four lidded jars. Do not fill up the jars entirely - the wax should reach the top curve of the jar. Secure the wick with a clothespin, popsicle stick, etc. Do not trim the wick. Tip: If you like, you can use wick stickers to secure them to the bottom of the jars before pouring.
7
Allow your candle and succulent pieces to cool and set for 24 hours. Carefully remove the succulent wax pieces from the mold. If you find the skewer did not pierce the mold to the top, gently use the skewer again to poke through the embed to create a complete hole. Tip: If you have trouble removing the molded pieces, place the mold into the freezer for a few minutes to loosen the wax.
8
Slide the succulent piece through the wick of the base and gently push down into the glass until it is flush with the top. Some wax may scrape off the sides of the molded piece as you do this - that’s OK. Once the molded piece is secure, trim the wick to ¼” tall. Allow the wax to finish curing for 3-5 days before burning. Allow your candle to reach a full melt pool for best results.
Tutorial credits
Photographer: Amanda Kerzman
Succulent Candle Project
- Skill Level: Intermediate
- Time: 2 hours
- Yield: 4 candles
Project Description
Created by London of Particle Goods, this Succulent Candle is almost too cute to burn! But it smells so good, you'll want to use it over and over again.
The project is a two-part process. First, the succulent pieces are made in the 4 Cavity Succulent Silicone Mold. After lots of testing, London found that mixing white beeswax with Nature Wax C-3 created a firm yet moldable texture that came out of the mold easily. A hole is poked through each embed and the wick is threaded through.
We recommend getting a few basic soy candles under your belt before attempting this project. If you're new to this, read the How to Make Soy Wax Candles article by London - it's full of everything you need to know including pour temperatures, fragrance usage rates, and more.
Want more candle making supplies? Check out these DIY candle making recipes.
You will need:
- Succulents:
- 4 Cavity Succulent Silicone Mold
- 8.2 oz. Nature Wax C-3
- 2.1 oz. White Beeswax
- 0.8 oz. Cactus Flower Fragrance Oil
- Sage Green Wax Dye Flakes
- Base:
- Four 8 oz. Lidded Glass Jars
- Four HTP 1212 Wicks
- 36 oz. Nature Wax C-3
- 2.8 oz. Cactus Flower Fragrance Oil
Follow these steps:
1
Place a half-filled pot of water on the stove, bring it to a low simmer, and nest your pouring pitcher (or other heat-safe container) inside. Weigh out 8.2 ounces of Nature Wax C-3 and 2.1 ounces beeswax and combine in the pouring pitcher. Add 2 generous pinches of Sage Green Wax Dye Flakes just as the wax has melted and stir to incorporate. While the wax heats to 185° F, prep your fragrance.
2
Measure 0.8 ounces of Cactus Flower Fragrance Oil into a glass container. When the wax reaches 185° F, remove it from heat and mix in the fragrance. Stir slowly and gently for 1-2 minutes to fully incorporate. Once the wax is at 160° F, pour into each cavity of the Succulent Silicone Mold. Set aside to cool. Tip: To avoid the frosting effect on the surface of the finished succulent, preheat the silicone mold with a heat gun or on the lowest oven setting for about 3-5 minutes (just until slightly warm to the touch). This helps create a smooth surface and allows the molded wax to pop out easier.
3
Once the wax in the molds looks fully opaque (about 1-2 hours), very gently use the sharp end of a skewer to poke a hole down through the center of the succulent for the wick. Set aside to continue cooling.
4
Weigh out 36 ounces of Nature Wax C-3 and place it in the pouring pitcher. Bring the water to a low simmer and start to melt. Measure 2.6 ounces of Cactus Flower Fragrance Oil into a glass container.
5
Once the wax reaches 185° F, remove from the heat and slowly stir in the fragrance oil for 1-2 minutes.
6
Once the wax has cooled to 145-150° F, pour it slowly into the four lidded jars. Do not fill up the jars entirely - the wax should reach the top curve of the jar. Secure the wick with a clothespin, popsicle stick, etc. Do not trim the wick. Tip: If you like, you can use wick stickers to secure them to the bottom of the jars before pouring.
7
Allow your candle and succulent pieces to cool and set for 24 hours. Carefully remove the succulent wax pieces from the mold. If you find the skewer did not pierce the mold to the top, gently use the skewer again to poke through the embed to create a complete hole. Tip: If you have trouble removing the molded pieces, place the mold into the freezer for a few minutes to loosen the wax.
8
Slide the succulent piece through the wick of the base and gently push down into the glass until it is flush with the top. Some wax may scrape off the sides of the molded piece as you do this - that’s OK. Once the molded piece is secure, trim the wick to ¼” tall. Allow the wax to finish curing for 3-5 days before burning. Allow your candle to reach a full melt pool for best results.
Tutorial credits
Photographer: Amanda Kerzman