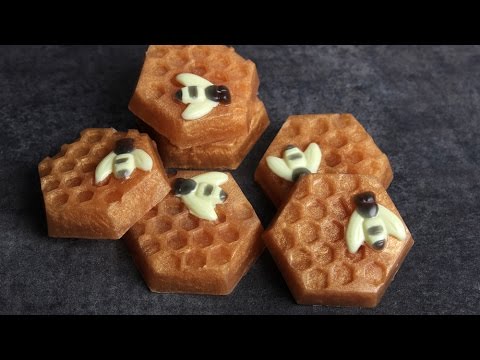


Honey Bee Soap Project
- Skill Level: Intermediate
- Time: 1 hour
- Yield: 6 bars of soap
Project Description
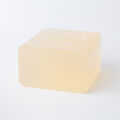
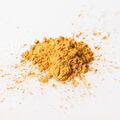
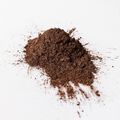
This recipe is made with Honey Melt and Pour Soap Base, which contains real honey. Pure Honey Fragrance Oil gives these bars a delectable scent. To mimic the color of honeycomb, we used a combination of King's Gold Mica and just a touch of Cappuccino Mica.
We highly recommend having a spray bottle of 99% isopropyl alcohol nearby for this project. Spritzing the soap with alcohol gets rid of air bubbles and prevents the bee details from coming apart from the honeycomb.
Filling in the bee details takes a steady hand and a little patience. We recommend using a dropper or injector tool to fill in the black stripes. Without these tools, it’s tricky to fill in such small details. A clean up tool is perfect for fixing any mistakes; we've definitely used it a few times!
You will need:
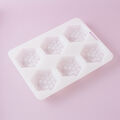
- 6 Cavity Honeycomb Silicone Mold
- 19.5 oz. Honey Melt and Pour Soap
- 0.3 oz. Pure Honey Fragrance Oil
- 1/2 tsp. King’s Gold Mica
- 1/8 tsp. Cappuccino Mica
- Black Oxide Color Block
- Shimmer Buttercup Color Block
- Droppers
- 99% Isopropyl Alcohol in Spray Bottle
- Optional: Clean Up Tool
Follow these steps:
1
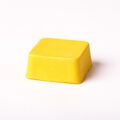
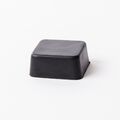
Chop 4 ounces of Honey Melt and Pour Soap, place it in a heat-safe container, and melt in the microwave using 5-10 second bursts. Divide the soap evenly into 2 small heat-safe containers. To one container, add shavings of the Black Oxide Color Block until you get a dark black shade. To the other container, add shavings of the Buttercup Color Block until you get a bright yellow shade.
2
Using a dropper or the injector soap tool, fill in the head of the bee with black soap. It’s helpful to tilt the mold slightly to help the soap stay in the head cavity of the mold, without dripping into the body. If it does, allow the soap to cool and harden for a few minutes. Then, use the clean up tool to perfect the design, as shown below. Spritz the soap with 99% isopropyl alcohol to get rid of any bubbles.
3
Use the dropper or the injector tool to fill in two small stripes of the bee. Just a drop or two of soap in each stripe usually does the trick. Use the clean up tool to perfect the stripes if necessary. During this process, you may need to reheat the black soap in the microwave to become liquid and workable. Use 3 second bursts to reheat the soap in order to prevent scorching. Allow the details in the mold to cool and harden for several minutes.
4
Reheat the yellow soap in the microwave using 3-5 second bursts. If necessary, allow it to cool until it is below 130° F. If the soap is too hot, it may melt the small black details. Once it is the correct temperature, spritz the mold with 99% isopropyl alcohol. Then, use a dropper to add yellow soap into the bee cavity. If necessary, clean up any drips or imperfections with a clean up tool. Spritz with alcohol to remove bubbles, and allow to fully cool and harden for several minutes.
5
While the soap cools, it’s time to prep your colorants. Disperse 1/8 teaspoon of Cappuccino Mica into 1/4 teaspoon of 99% isopropyl alcohol and 1/2 teaspoon King’s Gold Mica with 1 teaspoon 99% isopropyl alcohol. Then, chop and melt 15.5 ounces of Honey Melt and Pour in the microwave using 20 second bursts. Once completely melted, add all of the dispersed King’s Gold Mica and Cappuccino Mica and use a spoon to fully mix in.
6
Add 0.3 ounces of Pure Honey Fragrance Oil and use a spoon to fully mix in.
7
Check the temperature of the soap. If it’s hotter than 130° F, allow it to cool so it doesn't melt the bee details. Once the soap is between 120-129° F, spritz the mold with 99% isopropyl alcohol. Pour the gold soap into each cavity.
8
Spritz each cavity with 99% isopropyl alcohol to help disperse bubbles. Allow the soap to fully cool and harden for several hours before attempting to remove. Once fully hardened, remove the bars from the mold and wrap in plastic wrap to help prevent glycerin dew. Enjoy!
Tutorial credits
Photographer: Amanda Kerzman
Honey Bee Soap Project
- Skill Level: Intermediate
- Time: 1 hour
- Yield: 6 bars of soap
Project Description
This recipe is made with Honey Melt and Pour Soap Base, which contains real honey. Pure Honey Fragrance Oil gives these bars a delectable scent. To mimic the color of honeycomb, we used a combination of King's Gold Mica and just a touch of Cappuccino Mica.
We highly recommend having a spray bottle of 99% isopropyl alcohol nearby for this project. Spritzing the soap with alcohol gets rid of air bubbles and prevents the bee details from coming apart from the honeycomb.
Filling in the bee details takes a steady hand and a little patience. We recommend using a dropper or injector tool to fill in the black stripes. Without these tools, it’s tricky to fill in such small details. A clean up tool is perfect for fixing any mistakes; we've definitely used it a few times!
You will need:
- 6 Cavity Honeycomb Silicone Mold
- 19.5 oz. Honey Melt and Pour Soap
- 0.3 oz. Pure Honey Fragrance Oil
- 1/2 tsp. King’s Gold Mica
- 1/8 tsp. Cappuccino Mica
- Black Oxide Color Block
- Shimmer Buttercup Color Block
- Droppers
- 99% Isopropyl Alcohol in Spray Bottle
- Optional: Clean Up Tool
Follow these steps:
1
Chop 4 ounces of Honey Melt and Pour Soap, place it in a heat-safe container, and melt in the microwave using 5-10 second bursts. Divide the soap evenly into 2 small heat-safe containers. To one container, add shavings of the Black Oxide Color Block until you get a dark black shade. To the other container, add shavings of the Buttercup Color Block until you get a bright yellow shade.
2
Using a dropper or the injector soap tool, fill in the head of the bee with black soap. It’s helpful to tilt the mold slightly to help the soap stay in the head cavity of the mold, without dripping into the body. If it does, allow the soap to cool and harden for a few minutes. Then, use the clean up tool to perfect the design, as shown below. Spritz the soap with 99% isopropyl alcohol to get rid of any bubbles.
3
Use the dropper or the injector tool to fill in two small stripes of the bee. Just a drop or two of soap in each stripe usually does the trick. Use the clean up tool to perfect the stripes if necessary. During this process, you may need to reheat the black soap in the microwave to become liquid and workable. Use 3 second bursts to reheat the soap in order to prevent scorching. Allow the details in the mold to cool and harden for several minutes.
4
Reheat the yellow soap in the microwave using 3-5 second bursts. If necessary, allow it to cool until it is below 130° F. If the soap is too hot, it may melt the small black details. Once it is the correct temperature, spritz the mold with 99% isopropyl alcohol. Then, use a dropper to add yellow soap into the bee cavity. If necessary, clean up any drips or imperfections with a clean up tool. Spritz with alcohol to remove bubbles, and allow to fully cool and harden for several minutes.
5
While the soap cools, it’s time to prep your colorants. Disperse 1/8 teaspoon of Cappuccino Mica into 1/4 teaspoon of 99% isopropyl alcohol and 1/2 teaspoon King’s Gold Mica with 1 teaspoon 99% isopropyl alcohol. Then, chop and melt 15.5 ounces of Honey Melt and Pour in the microwave using 20 second bursts. Once completely melted, add all of the dispersed King’s Gold Mica and Cappuccino Mica and use a spoon to fully mix in.
6
Add 0.3 ounces of Pure Honey Fragrance Oil and use a spoon to fully mix in.
7
Check the temperature of the soap. If it’s hotter than 130° F, allow it to cool so it doesn't melt the bee details. Once the soap is between 120-129° F, spritz the mold with 99% isopropyl alcohol. Pour the gold soap into each cavity.
8
Spritz each cavity with 99% isopropyl alcohol to help disperse bubbles. Allow the soap to fully cool and harden for several hours before attempting to remove. Once fully hardened, remove the bars from the mold and wrap in plastic wrap to help prevent glycerin dew. Enjoy!
Tutorial credits
Photographer: Amanda Kerzman