


Neapolitan Soap Project
- Skill Level: Beginner
- Time: 2 hours
- Yield: About 3 pounds of soap
Project Description
This recipe uses a combination of white and clear melt and pour soap bases, along with Color Blocks to achieve contrasting layers. The combination of Dark Rich Chocolate Fragrance Oil and Strawberry Fragrance Oil is perfect for this design!
The key to layering melt and pour is 99% isopropyl alcohol to pop bubbles and adhere the layers, and a thermometer to ensure the soap isn't too hot. A little bit of patience is helpful as well, as you need to make sure the bottom layer is cool enough to support the next one.
You will need:
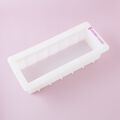
- 10″ Silicone Loaf Mold
- 32 oz. White Melt and Pour Soap Base
- 16 oz. Clear Melt and Pour Soap Base
- Brown Oxide Color Block
- Hot Pink Color Block
- 0.4 oz. Dark Rich Chocolate Fragrance Oil
- 0.4 oz. Vanilla Color Stabilizer
- 0.4 oz. Strawberry Fragrance Oil
- 99% Isopropyl Alcohol in a Spray Bottle
- Optional: Crinkle Cutter
Follow these steps:
1
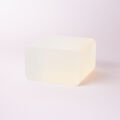
Chop 16 ounces of Clear Melt and Pour Soap into small pieces and place it into a medium heat-safe container. Chop 32 ounces of White Melt and Pour Soap into small pieces and split it evenly into two containers. You can eyeball it or weigh out 16 ounces into each one. You now have three containers of soap - one clear and two white.
2
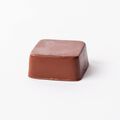
Place a chunk of the Brown Oxide Color Block into the container of clear soap. Melt in the microwave on 30 second bursts. Then stir in 0.4 ounces of Dark Rich Chocolate Fragrance Oil and 0.4 ounces of Vanilla Color Stabilizer. Mix throughly.
3
Pour the brown soap into the mold and spray the top with 99% isopropyl alcohol to get rid of air bubbles. Allow to cool for about 15-20 minutes so it forms a semi-firm layer on top.
4
Melt one container of white soap in the microwave using 30 second bursts. Allow to cool to about 125-130° F so it doesn't melt the brown layer. Spritz the brown layer with 99% isopropyl alcohol and pour the white soap into the mold. Spritz the top with alcohol again to help get rid of bubbles. Allow the layer to harden and cool for about 15-20 minutes.
5
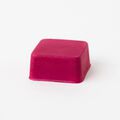
Place a chunk of Hot Pink Color Block into the last container of white soap. Melt in the microwave on 30 second bursts. Then stir in 0.4 ounces of Strawberry Fragrance Oil. When the pink soap is 125-130° F, spritz the white soap with 99% isopropyl alcohol and pour the pink soap into the mold. Spritz with alcohol to get rid of bubbles. Note: This project was originally made with Fired Up Fuchsia Color Block, which was discontinued. Hot Pink Color Block creates a similar shade but will look different from the photos.
6
Allow the soap to fully cool and harden for about 3-4 hours or up to overnight. Once the soap is completely cool and firm, remove from the mold and cut into bars. Wrap in plastic wrap to prevent glycerin dew. Enjoy! Note: We used the Crinkle Cutter, but you can use an unserrated knife.
Tutorial credits
Photographer: Amanda Kerzman
Neapolitan Soap Project
- Skill Level: Beginner
- Time: 2 hours
- Yield: About 3 pounds of soap
Project Description
This recipe uses a combination of white and clear melt and pour soap bases, along with Color Blocks to achieve contrasting layers. The combination of Dark Rich Chocolate Fragrance Oil and Strawberry Fragrance Oil is perfect for this design!
The key to layering melt and pour is 99% isopropyl alcohol to pop bubbles and adhere the layers, and a thermometer to ensure the soap isn't too hot. A little bit of patience is helpful as well, as you need to make sure the bottom layer is cool enough to support the next one.
You will need:
- 10″ Silicone Loaf Mold
- 32 oz. White Melt and Pour Soap Base
- 16 oz. Clear Melt and Pour Soap Base
- Brown Oxide Color Block
- Hot Pink Color Block
- 0.4 oz. Dark Rich Chocolate Fragrance Oil
- 0.4 oz. Vanilla Color Stabilizer
- 0.4 oz. Strawberry Fragrance Oil
- 99% Isopropyl Alcohol in a Spray Bottle
- Optional: Crinkle Cutter
Follow these steps:
1
Chop 16 ounces of Clear Melt and Pour Soap into small pieces and place it into a medium heat-safe container. Chop 32 ounces of White Melt and Pour Soap into small pieces and split it evenly into two containers. You can eyeball it or weigh out 16 ounces into each one. You now have three containers of soap - one clear and two white.
2
Place a chunk of the Brown Oxide Color Block into the container of clear soap. Melt in the microwave on 30 second bursts. Then stir in 0.4 ounces of Dark Rich Chocolate Fragrance Oil and 0.4 ounces of Vanilla Color Stabilizer. Mix throughly.
3
Pour the brown soap into the mold and spray the top with 99% isopropyl alcohol to get rid of air bubbles. Allow to cool for about 15-20 minutes so it forms a semi-firm layer on top.
4
Melt one container of white soap in the microwave using 30 second bursts. Allow to cool to about 125-130° F so it doesn't melt the brown layer. Spritz the brown layer with 99% isopropyl alcohol and pour the white soap into the mold. Spritz the top with alcohol again to help get rid of bubbles. Allow the layer to harden and cool for about 15-20 minutes.
5
Place a chunk of Hot Pink Color Block into the last container of white soap. Melt in the microwave on 30 second bursts. Then stir in 0.4 ounces of Strawberry Fragrance Oil. When the pink soap is 125-130° F, spritz the white soap with 99% isopropyl alcohol and pour the pink soap into the mold. Spritz with alcohol to get rid of bubbles. Note: This project was originally made with Fired Up Fuchsia Color Block, which was discontinued. Hot Pink Color Block creates a similar shade but will look different from the photos.
6
Allow the soap to fully cool and harden for about 3-4 hours or up to overnight. Once the soap is completely cool and firm, remove from the mold and cut into bars. Wrap in plastic wrap to prevent glycerin dew. Enjoy! Note: We used the Crinkle Cutter, but you can use an unserrated knife.
Tutorial credits
Photographer: Amanda Kerzman