

Kukui Oil Lip Balm Project
- Skill Level: Beginner
- Time: 30 minutes
- Yield: 10 lip tins
Project Description
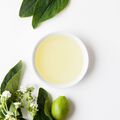
Kukui nut oil (pronounced koo-koo-ee) feels ultra luxurious on the skin. The kukui nut (or candelnut) tree is the state tree of Hawaii, and residents there have used the oil for many years. It’s commonly used in massage and face oils because it’s lightweight and doesn't leave skin feeling greasy.
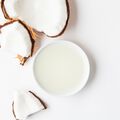
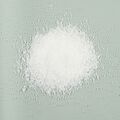
This simple lip balm combines kukui nut oil with another popular tropical ingredient – coconut oil! A bit of premium white beeswax gives the lip balm firmness.
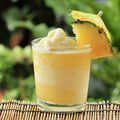
A touch of coconut flavor oil gives the balm a light, tropical scent. If you’re unfamiliar with flavor oils, they are essentially lip-safe fragrance oils. Interestingly, they don’t flavor the balm. If you’d like to taste the balm, you can add a touch of sweetener like Stevia or the lip smacking sweet flavor oil.
Want more simple skincare recipes? Check out these DIY skincare kits.
You will need:
- 10 Slidey Lip Tins
- 1 oz. Kukui Nut Oil
- 1 oz. Coconut Oil
- .5 oz. White Beeswax
- 1 mL Pineapple Flavor Oil*
- Dropper
*Note: Original recipe used Coconut Flavor Oil which has been discontinued. This recipe has been updated to include Pineapple Flavor Oil.
Follow these steps:
1
In a small heat-safe container, add 1 ounce of kukui nut oil, 1 ounce of coconut oil, and 0.5 ounces of white beeswax. Place the container in the microwave and melt the balm using 30-60 second bursts. Remove from the microwave carefully, as the container will be very hot.
2
Add 1 mL Coconut Flavor Oil and mix in with a spoon until fully incorporated.
3
Carefully pour the mixture into the Slidey Lip Tins. Allow it to fully cool and harden before use. Enjoy!
Tutorial credits
Photographer: Amanda Kerzman
Kukui Oil Lip Balm Project
- Skill Level: Beginner
- Time: 30 minutes
- Yield: 10 lip tins
Project Description
Kukui nut oil (pronounced koo-koo-ee) feels ultra luxurious on the skin. The kukui nut (or candelnut) tree is the state tree of Hawaii, and residents there have used the oil for many years. It’s commonly used in massage and face oils because it’s lightweight and doesn't leave skin feeling greasy.
This simple lip balm combines kukui nut oil with another popular tropical ingredient – coconut oil! A bit of premium white beeswax gives the lip balm firmness.
A touch of coconut flavor oil gives the balm a light, tropical scent. If you’re unfamiliar with flavor oils, they are essentially lip-safe fragrance oils. Interestingly, they don’t flavor the balm. If you’d like to taste the balm, you can add a touch of sweetener like Stevia or the lip smacking sweet flavor oil.
Want more simple skincare recipes? Check out these DIY skincare kits.
You will need:
- 10 Slidey Lip Tins
- 1 oz. Kukui Nut Oil
- 1 oz. Coconut Oil
- .5 oz. White Beeswax
- 1 mL Pineapple Flavor Oil*
- Dropper
*Note: Original recipe used Coconut Flavor Oil which has been discontinued. This recipe has been updated to include Pineapple Flavor Oil.
Follow these steps:
1
In a small heat-safe container, add 1 ounce of kukui nut oil, 1 ounce of coconut oil, and 0.5 ounces of white beeswax. Place the container in the microwave and melt the balm using 30-60 second bursts. Remove from the microwave carefully, as the container will be very hot.
2
Add 1 mL Coconut Flavor Oil and mix in with a spoon until fully incorporated.
3
Carefully pour the mixture into the Slidey Lip Tins. Allow it to fully cool and harden before use. Enjoy!
Tutorial credits
Photographer: Amanda Kerzman