


Cinnamon Cocoa Melt and Pour Soap Project
- Skill Level: Intermediate
- Time: 2 hours
- Yield: 50 ounces of soap
Project Description
Melt and pour soap is a great option for crisp and clean layers. There are a few tools and techniques you need for that. The first is patience. It’s important to allow the soap to cool and harden enough to support the next layer. The next is paying attention to temperature. It's crucial that the soap isn’t too hot when it’s poured or it may melt the layer below. The last is 99% isopropyl alcohol – it needs to be sprayed before each pour to help the layers adhere. We also like to spray it after pouring to get rid of bubbles.
Because of the bakery notes in the Cinnamon Cocoa Fragrance Oil, this soap will discolor without Vanilla Color Stabilizer. We added it to the white and brown soap to prevent bleeding in between the layers.
You will need:
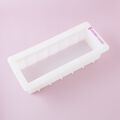
- 10″ Silicone Loaf Mold
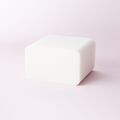
- 30 oz. White Melt and Pour Soap Base
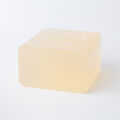
- 20 oz. Honey Melt and Pour Soap Base
- 0.8 oz. Cinnamon Cocoa Fragrance Oil
- 0.8 oz. Vanilla Color Stabilizer
- Brown Oxide Color Block
- Cocoa Powder
- 99% Isopropyl Alcohol in a Spray Bottle
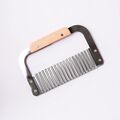
- Optional: Crinkle Cutter
Follow these steps:
1
Chop 30 ounces of White Melt and Pour Soap Base into small, uniform pieces. Place the soap into a heat-safe container. Chop 20 ounces of Honey Melt and Pour Soap Base and place into a separate heat-safe container.
2
Place the container of white soap into the microwave and melt using 30-60 second bursts. Add 0.4 ounces of Cinnamon Cocoa Fragrance Oil and 0.4 ounces of Vanilla Color Stabilizer. Use a spoon to mix.
3
To make each layer exactly the same size, place the mold on a scale and pour 10 ounces of white soap into the mold. Spritz the soap with 99% isopropyl alcohol to get rid of bubbles. Allow the layer to harden and cool for about 20-30 minutes so it can support the next layer.
4
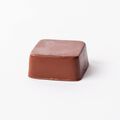
Melt 20 ounces of Honey Melt and Pour Soap Base in the microwave using 30-60 second bursts. Add shavings of the Brown Oxide Color Block and stir until you have a rich chocolate shade.
5
Add 0.4 ounces of Cinnamon Cocoa Fragrance Oil and 0.4 ounces of Vanilla Color Stabilizer. Stir thoroughly. Allow the soap to cool to 125-130° F so it doesn’t melt the soap below. Note: The Vanilla Color Stabilizer prevents the discoloration from bleeding into the white layers.
6
Spritz the white layer with 99% isopropyl alcohol and place the mold onto a scale. Pour 10 ounces of the brown soap into the mold and spritz with alcohol to get rid of bubbles. Allow the soap to cool for 20-30 minutes.
7
Remelt the white soap using 20-30 second bursts and allow it to cool to 125-130° F. Spritz the bottom layer with 99% isopropyl alcohol and pour 10 ounces of white soap into the mold. Spritz the soap with alcohol to get rid of bubbles. Allow this layer to cool and harden for 20-30 minutes.
8
Remelt the remaining brown soap using 10-20 second bursts and allow it to cool to about 125-130° F. Spritz the soap in the mold with 99% isopropyl alcohol and pour the remaining brown soap into the mold. Spritz with alcohol to get rid of bubbles and allow it to cool and harden for 20-30 minutes.
9
Remelt the remaining white soap using 10-20 second bursts and allow it to cool to about 125-130° F. Spritz the soap in the mold with 99% isopropyl alcohol and pour the remaining white soap into the mold. Spritz with alcohol to get rid of bubbles.
10
Place a small amount of cocoa powder into a sifter and gently dust on top of the soap. Allow the soap to fully cool and harden for 4-6 hours or up to overnight.
11
Unmold and cut into bars with either a non-serrated knife or a crinkle cutter. To prevent glycerin dew, wrap the soap in plastic wrap. Enjoy!
Tutorial credits
Photographer: Amanda Kerzman
Cinnamon Cocoa Melt and Pour Soap Project
- Skill Level: Intermediate
- Time: 2 hours
- Yield: 50 ounces of soap
Project Description
Melt and pour soap is a great option for crisp and clean layers. There are a few tools and techniques you need for that. The first is patience. It’s important to allow the soap to cool and harden enough to support the next layer. The next is paying attention to temperature. It's crucial that the soap isn’t too hot when it’s poured or it may melt the layer below. The last is 99% isopropyl alcohol – it needs to be sprayed before each pour to help the layers adhere. We also like to spray it after pouring to get rid of bubbles.
Because of the bakery notes in the Cinnamon Cocoa Fragrance Oil, this soap will discolor without Vanilla Color Stabilizer. We added it to the white and brown soap to prevent bleeding in between the layers.
You will need:
- 10″ Silicone Loaf Mold
- 30 oz. White Melt and Pour Soap Base
- 20 oz. Honey Melt and Pour Soap Base
- 0.8 oz. Cinnamon Cocoa Fragrance Oil
- 0.8 oz. Vanilla Color Stabilizer
- Brown Oxide Color Block
- Cocoa Powder
- 99% Isopropyl Alcohol in a Spray Bottle
- Optional: Crinkle Cutter
Follow these steps:
1
Chop 30 ounces of White Melt and Pour Soap Base into small, uniform pieces. Place the soap into a heat-safe container. Chop 20 ounces of Honey Melt and Pour Soap Base and place into a separate heat-safe container.
2
Place the container of white soap into the microwave and melt using 30-60 second bursts. Add 0.4 ounces of Cinnamon Cocoa Fragrance Oil and 0.4 ounces of Vanilla Color Stabilizer. Use a spoon to mix.
3
To make each layer exactly the same size, place the mold on a scale and pour 10 ounces of white soap into the mold. Spritz the soap with 99% isopropyl alcohol to get rid of bubbles. Allow the layer to harden and cool for about 20-30 minutes so it can support the next layer.
4
Melt 20 ounces of Honey Melt and Pour Soap Base in the microwave using 30-60 second bursts. Add shavings of the Brown Oxide Color Block and stir until you have a rich chocolate shade.
5
Add 0.4 ounces of Cinnamon Cocoa Fragrance Oil and 0.4 ounces of Vanilla Color Stabilizer. Stir thoroughly. Allow the soap to cool to 125-130° F so it doesn’t melt the soap below. Note: The Vanilla Color Stabilizer prevents the discoloration from bleeding into the white layers.
6
Spritz the white layer with 99% isopropyl alcohol and place the mold onto a scale. Pour 10 ounces of the brown soap into the mold and spritz with alcohol to get rid of bubbles. Allow the soap to cool for 20-30 minutes.
7
Remelt the white soap using 20-30 second bursts and allow it to cool to 125-130° F. Spritz the bottom layer with 99% isopropyl alcohol and pour 10 ounces of white soap into the mold. Spritz the soap with alcohol to get rid of bubbles. Allow this layer to cool and harden for 20-30 minutes.
8
Remelt the remaining brown soap using 10-20 second bursts and allow it to cool to about 125-130° F. Spritz the soap in the mold with 99% isopropyl alcohol and pour the remaining brown soap into the mold. Spritz with alcohol to get rid of bubbles and allow it to cool and harden for 20-30 minutes.
9
Remelt the remaining white soap using 10-20 second bursts and allow it to cool to about 125-130° F. Spritz the soap in the mold with 99% isopropyl alcohol and pour the remaining white soap into the mold. Spritz with alcohol to get rid of bubbles.
10
Place a small amount of cocoa powder into a sifter and gently dust on top of the soap. Allow the soap to fully cool and harden for 4-6 hours or up to overnight.
11
Unmold and cut into bars with either a non-serrated knife or a crinkle cutter. To prevent glycerin dew, wrap the soap in plastic wrap. Enjoy!
Tutorial credits
Photographer: Amanda Kerzman