
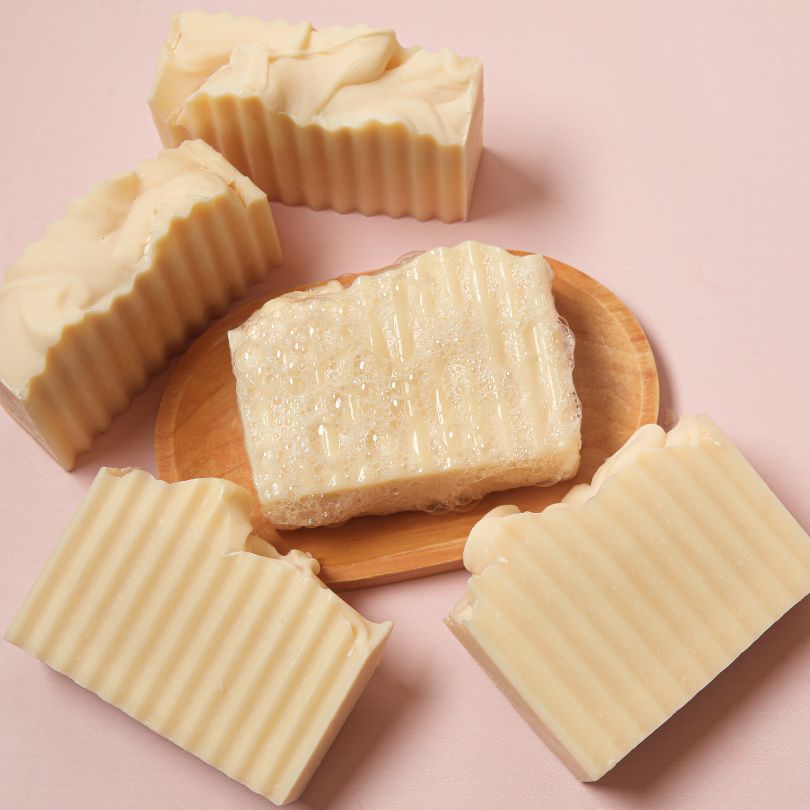

Beginner Cold Process Soap Project
This beginner-friendly cold process project is designed to take away the overwhelm and focus on the fundamentals. With just oils, water, and lye, you’ll learn the core techniques that every soapmaker builds on—no fragrances, no colors, no extra steps. Just the basics, made simple.
You’ll get comfortable with the process, understand how the ingredients come together, and create a beautiful, gentle bar of soap from scratch. From here, the possibilities are endless—but this is where it all begins.
What You Need:


Instructions

You will need:
- 33 oz Beginner Quick Mix
- 4.7 oz Sodium Hydroxide Lye
- 10.5 oz Distilled Water
- 10 inch Silicone Mold
- Stick blender
- Safety goggles
- Heat safe containers for mixing
Follow these steps:
1
Slowly and carefully add 4.7 ounces of lye to 10.5 ounces of distilled water and gently stir until the lye has fully dissolved and the liquid is clear. Set aside to cool.
2
Melt the entire back of Beginner Quick Mix until it's completely clear and not cloudy. Allow the lye water and the oils to cool to 130° F or below (and ideally within 10 degrees of each other). For this recipe, both were around 120° F.
3
Place your stick blender into the bowl. Gently tap it on the bottom several times to release any bubbles that got trapped by the stick blender head. This is called “burping."
4
Once bubbles no longer rise to the surface, gently pour the lye water into the bowl.
5
Turn on the stick blender and pulse several times. You'll immediately see the lye and oils come together and create a creamy yellow color. Alternate between pulsing the stick blender and using it to stir. After about 30 seconds, test for trace. Trace is the stage when oils and lye water fully emulsify. At this stage, your soap will be at a "thin" trace.
6
You may notice the soap starting to lighten in color. It will also get thicker. The soap should be thick enough to support the trailings on the surface and the consistency is slightly thinner than pudding or a milkshake. This is perfect for pouring.
7
Pour the soap into the mold. Scrape the sides of the bowl so you get every last bit!
8
Firmly tap the mold on the counter to pop any air bubbles.
Allow the soap to sit in the mold for 3-4 days. Once the sides of the mold cleanly release without tearing, flip the mold upside down and gently unmold the soap. Cut with a non-serrated knife and let the bars cure for 4-6 weeks. Cure the soap in a cool, dry place with plenty of airflow. That allows excess water to evaporate, which makes the bars firmer and last longer in the shower.
Tutorial credits
Photographer: Hannah Wong
Beginner Cold Process Soap Project
- LEVEL Beginner
- TIME 1 hour
- YIELD 3 Pounds of Soap
Project Description
You’ll get comfortable with the process, understand how the ingredients come together, and create a beautiful, gentle bar of soap from scratch. From here, the possibilities are endless—but this is where it all begins.
You will need:
- 33 oz Beginner Quick Mix
- 4.7 oz Sodium Hydroxide Lye
- 10.5 oz Distilled Water
- 10 inch Silicone Mold
- Stick blender
- Safety goggles
- Heat safe containers for mixing
Follow these steps:
1
Slowly and carefully add 4.7 ounces of lye to 10.5 ounces of distilled water and gently stir until the lye has fully dissolved and the liquid is clear. Set aside to cool.
2
Melt the entire back of Beginner Quick Mix until it's completely clear and not cloudy. Allow the lye water and the oils to cool to 130° F or below (and ideally within 10 degrees of each other). For this recipe, both were around 120° F.
3
Place your stick blender into the bowl. Gently tap it on the bottom several times to release any bubbles that got trapped by the stick blender head. This is called “burping."
4
Once bubbles no longer rise to the surface, gently pour the lye water into the bowl.
5
Turn on the stick blender and pulse several times. You'll immediately see the lye and oils come together and create a creamy yellow color. Alternate between pulsing the stick blender and using it to stir. After about 30 seconds, test for trace. Trace is the stage when oils and lye water fully emulsify. At this stage, your soap will be at a "thin" trace.
6
You may notice the soap starting to lighten in color. It will also get thicker. The soap should be thick enough to support the trailings on the surface and the consistency is slightly thinner than pudding or a milkshake. This is perfect for pouring.
7
Pour the soap into the mold. Scrape the sides of the bowl so you get every last bit!
8
Firmly tap the mold on the counter to pop any air bubbles.
Allow the soap to sit in the mold for 3-4 days. Once the sides of the mold cleanly release without tearing, flip the mold upside down and gently unmold the soap. Cut with a non-serrated knife and let the bars cure for 4-6 weeks. Cure the soap in a cool, dry place with plenty of airflow. That allows excess water to evaporate, which makes the bars firmer and last longer in the shower.
Tutorial credits
Photographer: Hannah Wong