


Sushi Soap Project
- Skill Level: Advanced
- Time:
- Yield: About 2 pounds of soap
Project Description
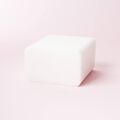
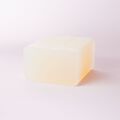
This project is not for the faint of heart. It’s not particularly difficult, but it does take several batches of soap and a few days to complete. First, several column embeds are created to look like sushi fillings. We used White Melt and Pour Soap Base and Clear Melt and Pour Soap Base to expedite the process, but the embeds can also be made with cold process soap.
Once the embeds are cool and hard, they are cut into random shapes. The exact shape doesn’t really matter, but they look more natural than a perfect square. For our first attempt at this project, we used a mixture of fresh cold process batter and finely chopped white cold process soap to create a rice texture.
The embeds are inserted into the Mini Star Silicone Column Mold, and white soap is poured around them. After about 1-2 days, the soap can be removed from the mold and cut into different shapes.
The final step is painting cold process soap on the outside of the soap. We used a shaving brush for this step, but any large fluffy paint brush will do the trick. We experimented with painting the entire batch first then cutting, as well as painting the individual bars. We found painting the individual bars a little bit easier – the outer layer tended to crack when we cut the soap after.
It’s a fairly complicated project but we think it’s worth it. We think they’ll be a hit at markets – they’re a great conversation piece. They would also be the perfect gift for any sushi enthusiast in your life.
You will need:
- Sushi Embeds:
- our Mini Star Silicone Column Molds
- 5 oz. LCP White Melt and Pour Soap Base
- Chrome Green Color Block
- 11 oz. LCP Clear Melt and Pour Soap Base
- Chrome Green Color Block
- Fizzy Lemonade Color Block
- Perfect Orange Color Block
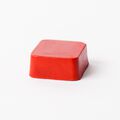
- Perfect Red Color Block*
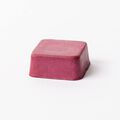
- Shimmer Merlot Sparkle Color Block
- Sushi Base:
- Silicone Column Mold
- 6 oz. Coconut Oil (30%)
- 6 oz. Palm Oil (30%)
- 4 oz. Rice Bran Oil (20%)
- 1 oz. Shea Butter (5%)
- 3 oz. Sweet Almond Oil (15%)
- 6 oz. Distilled Water
- 2.8 oz. Sodium Hydroxide Lye
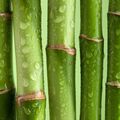
- 1 oz. Fresh Bamboo Fragrance Oil
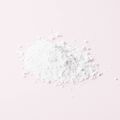
- Titanium Dioxide
- Sushi Outer Layer:
- 2.1 oz. Coconut Oil (30%)
- 2.1 oz. Palm Oil (30%)
- 1.4 oz. Rice Bran Oil (20%)
- 0.4 oz. Shea Butter (5%)
- 1.1 oz. Sweet Almond Oil (15%)
- 1 oz. Sodium Hydroxide Lye
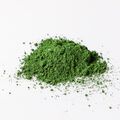
- Green Chrome Oxide Pigment
- Black Oxide Pigment
- Optional: Shaving Brush
Follow these steps:
MAKE THE EMBEDS
1
Chop 11 ounces of LCP Clear Melt and Pour Soap Base into small uniform pieces. Then, chop 5 ounces of LCP White Melt and Pour Soap Base into small uniform pieces. Add the following amounts of soap base and color blocks to separate heat-safe containers. Melt the soap and color blocks in the microwave separately using 10-20 second bursts.
NOTE: If you have fewer than 4 Mini Square Silicone Column Molds, you’ll need to make the embeds in batches.
-
Salmon Embed: 3.5 oz. LCP Clear Melt and Pour Soap Base + 0.5 oz. LCP White Soap Base + equal amounts of Perfect Orange Color Block, Fired Up Fuchsia Color Block, and Fizzy Lemonade Color Block + a very small shaving of Shimmer Merlot Sparkle Color Block. Note: This project was originally made with Fired Up Fuchsia Color Block, which was discontinued. Perfect Red Color Block creates a similar shade but will look different from the photos.
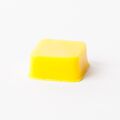
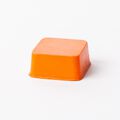
- Orange Embed: 4 oz. LCP Clear Melt and Pour Soap Base + Perfect Orange Color Block shavings
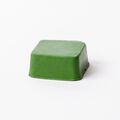
- Green Embed: 3.5 oz. LCP Clear Melt and Pour Soap Base + 0.5 oz. LCP White Soap Base + equal amounts of Fizzy Lemonade Color Block and Chrome Green Color Block shavings
- Light Green Embed: 4 oz. LCP White Melt and Pour Soap Base + equal amounts of Fizzy Lemonade Color Block and Chrome Green Color Block shavings
2
After melting one container of soap, immediately pour it into one of the Mini Square Silicone Column Molds. Place the mold into a sturdy and tall container to make sure it stays upright and the soap doesn’t pour out. Repeat until you’ve created all 4 embeds (green, light green, salmon, and orange). Allow the embeds to fully harden and cool for several hours.
3
Remove the embeds from the molds. Trim the sides to create triangles leaving a square center – we like using a Clean Up Tool. Use a sharp, non-serrated knife to cut the corners off the embeds as you see fit. We cut one corner off both green embeds and the salmon embed. Then we cut the orange embed into four equal pieces to look like carrots. Don’t worry too much about how you cut the embeds – the key is not keeping them perfect. Set aside to prep the base.
MAKE THE SUSHI BASE
FRAGRANCE PREP: Measure 1 ounce of Fresh Bamboo Fragrance Oil into a small glass container and set aside.
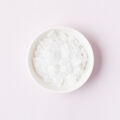
COLORANT PREP: Disperse 3 teaspoons of the titanium dioxide into 3 tablespoons of sunflower or sweet almond oil (or any other liquid oil). Use a mini mixer to get rid of any clumps.
Optional: To ensure the titanium dioxide blends smoothly into the soap batter, we recommend micronizing it before dispersing it in oil. Use a coffee grinder to break up any clumps of color and prevent streaks of white from showing in the final soap. We like to use a coffee grinder that has a removable stainless steel mixing area for easy cleaning.
SAFETY FIRST: Suit up for safe handling practices. That means goggles, gloves, and long sleeves. Make sure kids, pets, other distractions, and tripping hazards are out of the house or don’t have access to your soaping space. Always soap in a well-ventilated area.
1
Slowly and carefully add 2.8 ounces of lye to 6 ounces of water and gently stir until the lye has fully dissolved and the liquid is clear. Set aside to cool. If you’d like a harder bar of soap that releases faster from the mold, you can add sodium lactate to the cooled lye water. Use 1 teaspoon of sodium lactate per pound of oils in the recipe. For this recipe, you’d add 1 teaspoon sodium lactate.
2
In a large glass bowl, combine and melt 6 ounces of coconut oil, 4 ounces of rice bran oil, 1 ounce of shea butter, 3 ounces of sweet almond oil, and 6 ounces of palm oil (remember to fully melt then mix your entire container of palm oil before portioning). Once the lye water and the oils have cooled to 130° F or below (and are ideally within 10 degrees of each other), add the lye water to the oils and stick blend the mixture to a thin trace.
3
Add all of the dispersed titanium dioxide, and use the stick blender to mix in thoroughly.
4
Add the 1 ounce of Fresh Bamboo Fragrance Oil. If the soap is still quite thin, use the stick blender to mix in the fragrance. If it’s becoming thick, use a whisk to mix it in.
5
Pour a small amount of the soap into the Silicone Column Mold and place the embeds in the center in whatever pattern you like.
6
Pour (or spoon) the soap into the mold in different areas to help the soap surround the embeds easily.
7
Very carefully tap the mold on the counter to get rid of bubbles. Be careful to not tap the mold too hard, or the airlock can break and the mold can pop open. To prevent this, you can clamp the sides of the mold together.
8
Place the mold in the fridge for at least 4 hours. If the soap becomes too hot, it could warp the embeds or the white soap could develop glycerin rivers. Allow the soap to stay in the mold for 1-2 days.
9
Unmold the soap. If the sides of the mold do not peel away easily, give it another day in the mold. Once unmolded, cut the soap into bars. Set them aside while you prepare the nori soap layer.
MAKE THE OUTER LAYER
COLORANT PREP: Disperse 1 teaspoon of the Black Oxide into 1 tablespoon of sunflower or sweet almond oil (or any other liquid oil). Then disperse 1 teaspoon of Green Chrome Oxide Pigment with 1 tablespoon lightweight liquid oil. Use a mini mixer to get rid of any clumps.
TOOL PREP: We found a shaving brush worked wonderfully for applying the black soap to the outside of each bar. If you don’t have one, a large paint brush can work as well. Have a cutting board or sheet of parchment/wax paper to lay each bar on once the soap is applied. You will have plenty of soap leftover, so have a small cavity mold to transfer the leftovers.
SAFETY FIRST: Suit up for safe handling practices. That means goggles, gloves, and long sleeves. Make sure kids, pets, other distractions, and tripping hazards are out of the house or don’t have access to your soaping space. Always soap in a well-ventilated area.
1
Slowly and carefully add 1 ounce of lye to 2.1 ounces of distilled water and gently stir until the lye has fully dissolved and the liquid is clear. Set aside to cool.
2
In a large glass bowl, combine and melt the 2.1 ounces of coconut oil, 1.4 ounces of rice bran oil, 0.4 ounces of shea butter, 1.1 ounces of sweet almond oil, and 2.1 ounces of palm oil (remember to fully melt then mix your entire container of palm oil before portioning). Once the lye water and the oils have cooled to 130° F or below (and are ideally within 10 degrees of each other), add the lye water to the oils and stick blend the mixture to a thin trace.
3
Add 1.5 teaspoons dispersed Black Oxide and 1 teaspoon dispersed Green Chrome Oxide Pigment. Use the stick blender to fully mix in the colorants.
4
Continue stick blending until you reach a medium trace that holds a peak
5
Using a brush, apply the black soap to the sides of each bar of soap. Use a combination of dabbing motions and brush strokes to create a textured appearance without a lot of the white soap showing through. Place each soap on a cutting board or sheet of parchment/wax paper to harden and dry.
6
Continue painting each soap until the outside of each is covered. Work somewhat quickly – the soap will continue to harden as it sits. Transfer the leftover soap batter to an individual cavity mold.
7
Allow the outside to harden for about 1-2 days before handling. Allow the soaps to cure for 4-6 weeks and enjoy!
Tutorial credits
Photographer: Amanda Kerzman, Christina Becker
Sushi Soap Project
- Skill Level: Advanced
- Time:
- Yield: About 2 pounds of soap
Project Description
This project is not for the faint of heart. It’s not particularly difficult, but it does take several batches of soap and a few days to complete. First, several column embeds are created to look like sushi fillings. We used White Melt and Pour Soap Base and Clear Melt and Pour Soap Base to expedite the process, but the embeds can also be made with cold process soap.
Once the embeds are cool and hard, they are cut into random shapes. The exact shape doesn’t really matter, but they look more natural than a perfect square. For our first attempt at this project, we used a mixture of fresh cold process batter and finely chopped white cold process soap to create a rice texture.
The embeds are inserted into the Mini Star Silicone Column Mold, and white soap is poured around them. After about 1-2 days, the soap can be removed from the mold and cut into different shapes.
The final step is painting cold process soap on the outside of the soap. We used a shaving brush for this step, but any large fluffy paint brush will do the trick. We experimented with painting the entire batch first then cutting, as well as painting the individual bars. We found painting the individual bars a little bit easier – the outer layer tended to crack when we cut the soap after.
It’s a fairly complicated project but we think it’s worth it. We think they’ll be a hit at markets – they’re a great conversation piece. They would also be the perfect gift for any sushi enthusiast in your life.
You will need:
- Sushi Embeds:
- our Mini Star Silicone Column Molds
- 5 oz. LCP White Melt and Pour Soap Base
- Chrome Green Color Block
- 11 oz. LCP Clear Melt and Pour Soap Base
- Chrome Green Color Block
- Fizzy Lemonade Color Block
- Perfect Orange Color Block
- Perfect Red Color Block*
- Shimmer Merlot Sparkle Color Block
- Sushi Base:
- Silicone Column Mold
- 6 oz. Coconut Oil (30%)
- 6 oz. Palm Oil (30%)
- 4 oz. Rice Bran Oil (20%)
- 1 oz. Shea Butter (5%)
- 3 oz. Sweet Almond Oil (15%)
- 6 oz. Distilled Water
- 2.8 oz. Sodium Hydroxide Lye
- 1 oz. Fresh Bamboo Fragrance Oil
- Titanium Dioxide
- Sushi Outer Layer:
- 2.1 oz. Coconut Oil (30%)
- 2.1 oz. Palm Oil (30%)
- 1.4 oz. Rice Bran Oil (20%)
- 0.4 oz. Shea Butter (5%)
- 1.1 oz. Sweet Almond Oil (15%)
- 1 oz. Sodium Hydroxide Lye
- Green Chrome Oxide Pigment
- Black Oxide Pigment
- Optional: Shaving Brush
Follow these steps:
MAKE THE EMBEDS
1
Chop 11 ounces of LCP Clear Melt and Pour Soap Base into small uniform pieces. Then, chop 5 ounces of LCP White Melt and Pour Soap Base into small uniform pieces. Add the following amounts of soap base and color blocks to separate heat-safe containers. Melt the soap and color blocks in the microwave separately using 10-20 second bursts.
NOTE: If you have fewer than 4 Mini Square Silicone Column Molds, you’ll need to make the embeds in batches.
-
Salmon Embed: 3.5 oz. LCP Clear Melt and Pour Soap Base + 0.5 oz. LCP White Soap Base + equal amounts of Perfect Orange Color Block, Fired Up Fuchsia Color Block, and Fizzy Lemonade Color Block + a very small shaving of Shimmer Merlot Sparkle Color Block. Note: This project was originally made with Fired Up Fuchsia Color Block, which was discontinued. Perfect Red Color Block creates a similar shade but will look different from the photos.
- Orange Embed: 4 oz. LCP Clear Melt and Pour Soap Base + Perfect Orange Color Block shavings
- Green Embed: 3.5 oz. LCP Clear Melt and Pour Soap Base + 0.5 oz. LCP White Soap Base + equal amounts of Fizzy Lemonade Color Block and Chrome Green Color Block shavings
- Light Green Embed: 4 oz. LCP White Melt and Pour Soap Base + equal amounts of Fizzy Lemonade Color Block and Chrome Green Color Block shavings
2
After melting one container of soap, immediately pour it into one of the Mini Square Silicone Column Molds. Place the mold into a sturdy and tall container to make sure it stays upright and the soap doesn’t pour out. Repeat until you’ve created all 4 embeds (green, light green, salmon, and orange). Allow the embeds to fully harden and cool for several hours.
3
Remove the embeds from the molds. Trim the sides to create triangles leaving a square center – we like using a Clean Up Tool. Use a sharp, non-serrated knife to cut the corners off the embeds as you see fit. We cut one corner off both green embeds and the salmon embed. Then we cut the orange embed into four equal pieces to look like carrots. Don’t worry too much about how you cut the embeds – the key is not keeping them perfect. Set aside to prep the base.
MAKE THE SUSHI BASE
FRAGRANCE PREP: Measure 1 ounce of Fresh Bamboo Fragrance Oil into a small glass container and set aside.
COLORANT PREP: Disperse 3 teaspoons of the titanium dioxide into 3 tablespoons of sunflower or sweet almond oil (or any other liquid oil). Use a mini mixer to get rid of any clumps.
Optional: To ensure the titanium dioxide blends smoothly into the soap batter, we recommend micronizing it before dispersing it in oil. Use a coffee grinder to break up any clumps of color and prevent streaks of white from showing in the final soap. We like to use a coffee grinder that has a removable stainless steel mixing area for easy cleaning.
SAFETY FIRST: Suit up for safe handling practices. That means goggles, gloves, and long sleeves. Make sure kids, pets, other distractions, and tripping hazards are out of the house or don’t have access to your soaping space. Always soap in a well-ventilated area.
1
Slowly and carefully add 2.8 ounces of lye to 6 ounces of water and gently stir until the lye has fully dissolved and the liquid is clear. Set aside to cool. If you’d like a harder bar of soap that releases faster from the mold, you can add sodium lactate to the cooled lye water. Use 1 teaspoon of sodium lactate per pound of oils in the recipe. For this recipe, you’d add 1 teaspoon sodium lactate.
2
In a large glass bowl, combine and melt 6 ounces of coconut oil, 4 ounces of rice bran oil, 1 ounce of shea butter, 3 ounces of sweet almond oil, and 6 ounces of palm oil (remember to fully melt then mix your entire container of palm oil before portioning). Once the lye water and the oils have cooled to 130° F or below (and are ideally within 10 degrees of each other), add the lye water to the oils and stick blend the mixture to a thin trace.
3
Add all of the dispersed titanium dioxide, and use the stick blender to mix in thoroughly.
4
Add the 1 ounce of Fresh Bamboo Fragrance Oil. If the soap is still quite thin, use the stick blender to mix in the fragrance. If it’s becoming thick, use a whisk to mix it in.
5
Pour a small amount of the soap into the Silicone Column Mold and place the embeds in the center in whatever pattern you like.
6
Pour (or spoon) the soap into the mold in different areas to help the soap surround the embeds easily.
7
Very carefully tap the mold on the counter to get rid of bubbles. Be careful to not tap the mold too hard, or the airlock can break and the mold can pop open. To prevent this, you can clamp the sides of the mold together.
8
Place the mold in the fridge for at least 4 hours. If the soap becomes too hot, it could warp the embeds or the white soap could develop glycerin rivers. Allow the soap to stay in the mold for 1-2 days.
9
Unmold the soap. If the sides of the mold do not peel away easily, give it another day in the mold. Once unmolded, cut the soap into bars. Set them aside while you prepare the nori soap layer.
MAKE THE OUTER LAYER
COLORANT PREP: Disperse 1 teaspoon of the Black Oxide into 1 tablespoon of sunflower or sweet almond oil (or any other liquid oil). Then disperse 1 teaspoon of Green Chrome Oxide Pigment with 1 tablespoon lightweight liquid oil. Use a mini mixer to get rid of any clumps.
TOOL PREP: We found a shaving brush worked wonderfully for applying the black soap to the outside of each bar. If you don’t have one, a large paint brush can work as well. Have a cutting board or sheet of parchment/wax paper to lay each bar on once the soap is applied. You will have plenty of soap leftover, so have a small cavity mold to transfer the leftovers.
SAFETY FIRST: Suit up for safe handling practices. That means goggles, gloves, and long sleeves. Make sure kids, pets, other distractions, and tripping hazards are out of the house or don’t have access to your soaping space. Always soap in a well-ventilated area.
1
Slowly and carefully add 1 ounce of lye to 2.1 ounces of distilled water and gently stir until the lye has fully dissolved and the liquid is clear. Set aside to cool.
2
In a large glass bowl, combine and melt the 2.1 ounces of coconut oil, 1.4 ounces of rice bran oil, 0.4 ounces of shea butter, 1.1 ounces of sweet almond oil, and 2.1 ounces of palm oil (remember to fully melt then mix your entire container of palm oil before portioning). Once the lye water and the oils have cooled to 130° F or below (and are ideally within 10 degrees of each other), add the lye water to the oils and stick blend the mixture to a thin trace.
3
Add 1.5 teaspoons dispersed Black Oxide and 1 teaspoon dispersed Green Chrome Oxide Pigment. Use the stick blender to fully mix in the colorants.
4
Continue stick blending until you reach a medium trace that holds a peak
5
Using a brush, apply the black soap to the sides of each bar of soap. Use a combination of dabbing motions and brush strokes to create a textured appearance without a lot of the white soap showing through. Place each soap on a cutting board or sheet of parchment/wax paper to harden and dry.
6
Continue painting each soap until the outside of each is covered. Work somewhat quickly – the soap will continue to harden as it sits. Transfer the leftover soap batter to an individual cavity mold.
7
Allow the outside to harden for about 1-2 days before handling. Allow the soaps to cure for 4-6 weeks and enjoy!
Tutorial credits
Photographer: Amanda Kerzman, Christina Becker