Peach Bath Truffles
- Skill Level: Intermediate
- Time: 1 hour
- Yield: about 18 bath truffles
Project Description
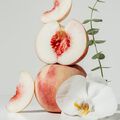
To create the peach shape, the truffle mixture is first scooped with an ice cream scoop. Then use your fingers to create a heart shape, and a spoon to create the curved crease in the center. It takes a little practice, but is worth it!
The bath truffles need about 3-4 days to dry and harden before use. We recommend filling your bathtub about 3/4 of the way, then breaking the truffle up under the faucet to activate the most bubbles. Because of the skin-loving butters in this recipe, the bubbles are dense, creamy, and moisturizing. Thanks to the polysorbate 80, we found the micas blend with the water and leave very little color on the tub.
The recipe makes about 18 truffles, depending on the size of your scoop. That means you have plenty to give to loved ones! We like to package them in small plastic bags or jars so they stay intact.
Need other bath bomb making supplies? Check out these DIY bath bomb kits.
You will need:
- 25 oz. Baking Soda (Sodium Bicarbonate)
- 10 oz. Citric Acid
- 4 oz. Cream of Tartar
- 15 oz. SLSA
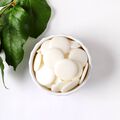
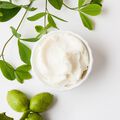
- 4 oz. Cocoa Butter
- 5 oz. Shea Butter
- 2 oz. Apricot Kernel Oil
- 1 oz. Polysorbate 80
- 1 oz. Liquid Glycerin
- 0.6 oz. Gardenia Peach Fragrance Oil
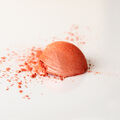
- 1 tsp. Desert Rose Mica
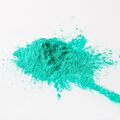
- Approx. 1/4 tsp. Shamrock Green Mica
Follow these steps:
1
In a small heat-safe container, add 5 ounces of shea butter, 4 ounces of cocoa butter, and 2 ounces of apricot kernel oil. Place the container in the microwave and melt the butters using 30-60 bursts. The cocoa butter takes a little while to melt. Be careful when removing it from the microwave, as it may be very hot.
2
Add 0.6 ounces of Gardenia Peach Fragrance Oil, 1 ounce of glycerin, and 1 ounce of polysorbate 80. Stir and set aside.
3
Place a strainer over a large container. Push 25 ounces of baking soda, 10 ounces of citric acid, and 4 ounces of cream of tartar through the strainer into the container.
4
Very carefully, add 15 ounces of SLSA to the container and mix it in very slowly. It can cause irritation if it becomes airborne - wear a mask to avoid irritation.
5
Add about ⅓ of the melted butter mixture. Use your hands to incorporate the liquid and powder ingredients together. If you prefer, you can use a stand or hand mixer. Make sure to incorporate any powders that tend to hang out at the bottom of the bowl.
6
Continue adding the liquid ingredients to the dry and mix together until fully incorporated. The final texture will be similar to cookie dough – soft, workable, and slightly sticky. Place about 5 ounces into a seperate container.
7
To the large container, add 1 teaspoon of Desert Rose Mica. To the smaller container, add 1/4 teaspoon of Shamrock Green Mica. Use your hands to mix the micas until there are no streaks or clumps of color. Add more mica if desired.
8
Lay down a sheet of parchment, wax, or freezer paper. Use an ice cream scoop to scoop the mixture onto the paper. Continue until all the mixture is scooped into balls. Tip: We found a temperature of about 85-100° F is a great scooping texture. If your dough is cooler than that, place the entire mixture into the microwave for 10-20 seconds to warm
9
Use your fingers to gently shape each truffle into a peach shape. We found that a soft heart shape is similar, with a gentle point at th bottom and indent in the top center - don't worry about it being perfect! Then, use a small spoon to create the curved indent. We found placing this indent slightly off-center created the best peach shape.
Then, grab a small piece of green truffle mixture, and place it in the center of each piece - pressing gently, yet firmly, to adhere the step to the top. Brush on a light layer of Desert Rose Mica into the indent of each peach to give it a soft shadow.
10
Allow the truffles to harden and dry for about 3-4 days. If you live in a very humid area, it may take longer. The truffles will always be a little bit delicate, even after they harden.
11
To use, fill the tub with hot water. Once it's about ¾ full, break the truffle up directly under the faucet to activate the bubbles. Enjoy.
Tutorial credits
Photographer: Amanda Kerzman


