


Flax Milk Layered Soap Project
- Skill Level: Advanced
- Time: 2 hours
- Yield: 10 bars of soap
Project Description
This recipe is from Bramble Berry CEO and Founder Anne-Marie's new book, Milk Soaps. The gorgeous design takes advantage of the natural tendencies of flax milk to accelerate the soap batter. You'll need to work quickly to create sloping layers and the white lines that stand out against the blue batter.
A forked top texture creates even more visual interest, and mallow extract adds to the naturally soothing nature of this bar.
Note that the bars go in the freezer overnight to prevent overheating.
Photos by © Charity Burggraaf. Excerpted from Milk Soaps © by Anne-Marie Faiola. Used with permission from Storey Publishing.
You will need:
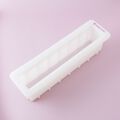
- Tall 12" Silicone Loaf Mold
- Powder Duster
- Easy Pour Container
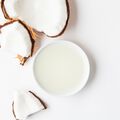
- 8.5 oz. Coconut Oil (25%)
- 8.5 oz. Palm Oil (25%)
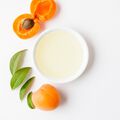
- 8.5 oz. Apricot Kernel Oil (25%)
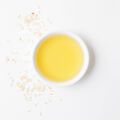
- 5.1 oz. Rice Bran Oil (15%)
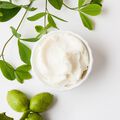
- 1.7 oz. Shea Butter (5%)
- 1.7 oz. Castor Oil (5%)
- 4.6 oz. Lye
- 7.8 oz. Distilled Water
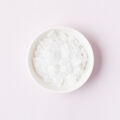
- 1 Tbsp. Sodium Lactate
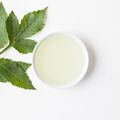
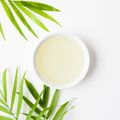
- 3.3 oz. Flax Milk
- 1.5 oz. Mallow Extract
- 2 oz. Lavender 40/42 Essential Oil
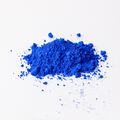
- 1 tsp. Ultramarine Blue Pigment Mixed with 1 Tbsp. Apricot Kernel Oil
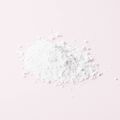
- 2 Tbsp. Titanium Dioxide
- Chopstick/Pencil for Propping Molds
- Fork
Follow these steps:
1
Melt the palm oil in its original container, mix it thoroughly, and measure 8.5 ounces into a heat-proof bowl large enough to hold the entire recipe. Melt and measure 8.5 ounces of coconut oil and add it to the bowl. Add 1.7 ounces of shea butter to the hot oils and stir until melted. If needed, microwave the bowl in 10-second bursts to melt the butter completely. Add 5.1 ounces of rice bran oil, 8.5 ounces of apricot kernel oil, and 1.7 ounces of castor oil and set the bowl aside.
2
Measure 7.8 ounces of distilled water and 4.6 ounces of lye into separate heat-proof containers. Add the lye to the water a tablespoon at a time (never add the liquid to the lye). Stir continuously until the lye fully dissolves and the water becomes clear. Stir 1 Tbsp. of sodium lactate into the lye-water.
3
When the oils and the lye-water have cooled to about 105° F, add the lye-water to the oils, pouring it over the shaft of the stick blender to minimize air bubbles.
4
Insert the stick blender into the batter, tilting it so that any trapped air can escape. Do not turn on the stick blender until the blades are fully immersed. Alternate pulsing and stirring with the stick blender until a very thin trace is achieved.
5
Add 1.5 ounces of mallow extract, 2 ounces of essential oil, 3.3 ounces of flax milk, and all of the dispersed blue colorant. The batter will thicken quickly, so don't overblend.
6
Pour some of the batter into the Easy Pour Container (you'll need to refill it). Place the mold on a scale and prop it at an angle by laying a chopstick under one of the long sides. Pour 5.5 to 6 ounces of batter along the lower side of the mold.
7
Place 1 teaspoon of titanium dioxide into the powder duster and gently tap it over the blue soap to create a light dusting across the surface.
8
Move the chopstick to the other side so that the mold tilts the other way. Pour low and slow over the powder to create another layer.
9
Continue alternating layers of batter and titanium dioxide, tilting the mold after every pour. You should have about seven layers and seven pencil lines, with enough batter left to make the final layer on top.
10
Lay the mold flat and pour or spoon the remaining batter on top. It will continue to thicken as you pour, so you may need to scrape the bowl to create the last couple of layers.
11
Use a fork to texture the top. We used the fork to pull batter up toward one longer side of the mold. Wipe the fork periodically with a paper towel to keep the tines from getting clogged with batter. Be careful not to disrupt the top pencil line by sticking the fork too far into the batter.
12
Spray thoroughly with 99% rubbing alcohol to prevent soda ash. To avoid a partial gel, either put the mold in the freezer or cover with a light blanket. The soaps shown here were covered and went through gel. If you don't gel, the blue will be slightly lighter.
13
Remove from the freezer and wait at least 48 hours before unmolding and cutting into bars. Frozen soaps tend to soften quite a bit as they thaw and need time to harden again.
14
Let the bars cure in a well-ventilated area for 4 to 6 weeks before using, turning them every few days to ensure they cure evenly.
Tutorial credits
Photos by © Charity Burggraaf. Excerpted from Milk Soaps © by Anne-Marie Faiola. Used with permission from Storey Publishing.
Flax Milk Layered Soap Project
- Skill Level: Advanced
- Time: 2 hours
- Yield: 10 bars of soap
Project Description
This recipe is from Bramble Berry CEO and Founder Anne-Marie's new book, Milk Soaps. The gorgeous design takes advantage of the natural tendencies of flax milk to accelerate the soap batter. You'll need to work quickly to create sloping layers and the white lines that stand out against the blue batter.
A forked top texture creates even more visual interest, and mallow extract adds to the naturally soothing nature of this bar.
Note that the bars go in the freezer overnight to prevent overheating.
Photos by © Charity Burggraaf. Excerpted from Milk Soaps © by Anne-Marie Faiola. Used with permission from Storey Publishing.
You will need:
- Tall 12" Silicone Loaf Mold
- Powder Duster
- Easy Pour Container
- 8.5 oz. Coconut Oil (25%)
- 8.5 oz. Palm Oil (25%)
- 8.5 oz. Apricot Kernel Oil (25%)
- 5.1 oz. Rice Bran Oil (15%)
- 1.7 oz. Shea Butter (5%)
- 1.7 oz. Castor Oil (5%)
- 4.6 oz. Lye
- 7.8 oz. Distilled Water
- 1 Tbsp. Sodium Lactate
- 3.3 oz. Flax Milk
- 1.5 oz. Mallow Extract
- 2 oz. Lavender 40/42 Essential Oil
- 1 tsp. Ultramarine Blue Pigment Mixed with 1 Tbsp. Apricot Kernel Oil
- 2 Tbsp. Titanium Dioxide
- Chopstick/Pencil for Propping Molds
- Fork
Follow these steps:
1
Melt the palm oil in its original container, mix it thoroughly, and measure 8.5 ounces into a heat-proof bowl large enough to hold the entire recipe. Melt and measure 8.5 ounces of coconut oil and add it to the bowl. Add 1.7 ounces of shea butter to the hot oils and stir until melted. If needed, microwave the bowl in 10-second bursts to melt the butter completely. Add 5.1 ounces of rice bran oil, 8.5 ounces of apricot kernel oil, and 1.7 ounces of castor oil and set the bowl aside.
2
Measure 7.8 ounces of distilled water and 4.6 ounces of lye into separate heat-proof containers. Add the lye to the water a tablespoon at a time (never add the liquid to the lye). Stir continuously until the lye fully dissolves and the water becomes clear. Stir 1 Tbsp. of sodium lactate into the lye-water.
3
When the oils and the lye-water have cooled to about 105° F, add the lye-water to the oils, pouring it over the shaft of the stick blender to minimize air bubbles.
4
Insert the stick blender into the batter, tilting it so that any trapped air can escape. Do not turn on the stick blender until the blades are fully immersed. Alternate pulsing and stirring with the stick blender until a very thin trace is achieved.
5
Add 1.5 ounces of mallow extract, 2 ounces of essential oil, 3.3 ounces of flax milk, and all of the dispersed blue colorant. The batter will thicken quickly, so don't overblend.
6
Pour some of the batter into the Easy Pour Container (you'll need to refill it). Place the mold on a scale and prop it at an angle by laying a chopstick under one of the long sides. Pour 5.5 to 6 ounces of batter along the lower side of the mold.
7
Place 1 teaspoon of titanium dioxide into the powder duster and gently tap it over the blue soap to create a light dusting across the surface.
8
Move the chopstick to the other side so that the mold tilts the other way. Pour low and slow over the powder to create another layer.
9
Continue alternating layers of batter and titanium dioxide, tilting the mold after every pour. You should have about seven layers and seven pencil lines, with enough batter left to make the final layer on top.
10
Lay the mold flat and pour or spoon the remaining batter on top. It will continue to thicken as you pour, so you may need to scrape the bowl to create the last couple of layers.
11
Use a fork to texture the top. We used the fork to pull batter up toward one longer side of the mold. Wipe the fork periodically with a paper towel to keep the tines from getting clogged with batter. Be careful not to disrupt the top pencil line by sticking the fork too far into the batter.
12
Spray thoroughly with 99% rubbing alcohol to prevent soda ash. To avoid a partial gel, either put the mold in the freezer or cover with a light blanket. The soaps shown here were covered and went through gel. If you don't gel, the blue will be slightly lighter.
13
Remove from the freezer and wait at least 48 hours before unmolding and cutting into bars. Frozen soaps tend to soften quite a bit as they thaw and need time to harden again.
14
Let the bars cure in a well-ventilated area for 4 to 6 weeks before using, turning them every few days to ensure they cure evenly.
Tutorial credits
Photos by © Charity Burggraaf. Excerpted from Milk Soaps © by Anne-Marie Faiola. Used with permission from Storey Publishing.