Tips for Bath and Body Product Photos

Beautiful product photos are incredibly important to building your brand and selling your bath and beauty products. Customers buy with their eyes before their wallets! This is especially true if you sell online - your photos tell the story of your product before purchasing.
Bramble Berry Creative Director Amanda has been styling and photographing bath and beauty products for over 9 years. Here are her tips for improving your product photography.
Consider your light
Light is the most important aspect of creating beautiful photos. There are many different options, but a good place to start is deciding whether to use natural light or artificial light.
Natural light refers to light from the sun. Natural sunlight is amazing because it’s free and creates beautiful photos. The look of natural light will change depending on where the sun is in the sky, and the amount of clouds diffusing the light. Direct, bright sunlight will create dramatic shadows in your photos, while indirect sunlight will create a softer shadow. Both can look great - which one you choose is personal preference.
A great way to start mastering natural light is to shoot beside a large window in your home. Photographers commonly stage their shot on the floor of a large sliding glass window, or on a table next to it. Don’t have a good window? Bring your products outside!
If you don’t have a good source of natural light or can only shoot your products at night, artificial light may be a better option. There are so many kinds of artificial light sources, and plenty of amazing resources online to help you choose the right option for you. YouTube videos are my go-to resource!
Experiment with angles and focal lengths
There are many angles that your product can be photographed from. There is no right or wrong angle, and each product may benefit from different angles. Generally, a good place to start is photographing your product straight on, with all of the product in the frame. Then, start practicing photographing the product top-down and from different side angles.

Experiment with taking photos close up and far away. The sea salt really pops when photographed up-close in the Sea Salt Swirl Soap Project.
It’s also important to experiment with different focal lengths. This means how zoomed in the photo is to your subject. A lot of products can benefit from being photographed close to emphasize the texture (more on that below). This is especially true for scrubs and soap with an interesting top, such as glitter and botanicals.
Be thoughtful with backdrops
What your product rests on and the background of your product is extremely important. It sets the scene and helps convey the “feeling” of your product. First, consider what story you’re trying to tell. If your product is all natural for example, a backdrop with a wood grain may be a good option. If your product is colorful and sparkly, a backdrop with a bold color can help it pop even more.
Backdrops come in a variety of materials, all of which have pros and cons. Large pieces of paper can do the trick - they are lightweight, easy to find, and affordable. But because they stain easily and can’t be wiped down, they are not as durable.
Vinyl backdrops are becoming increasingly easy to find online. They come in a variety of colors and patterns. They are lightweight, bendable, and easy to clean which is great for products with water and oil. They can be a little more expensive, but will last a long time.

This Rose Body Cream Project was shot on a vinyl backdrop with a wood grain pattern. The vinyl material makes it easy to clean, and the wood grain gives the project a natural feel.
Of course, there are always recycled materials such as scrap boards of wood, cutting boards, tablecloths, or even the back of a cookie sheet. Get creative! If your area has a second-hand building materials store, that can be a great place to start. Keep in mind that some of these materials can be heavy and difficult to transport, which may complicate taking photos in certain areas.
Play with props
Props can give your image more interest and be informative to the viewer. There are two types of props that are commonly used - objects and ingredients.
Objects such as spoons, napkins, dishes, or bowls can be used to create a scene that your product is “living in.” Placing your soap on a dish for example, could help the customer imagine what that soap would look like in their bathroom.
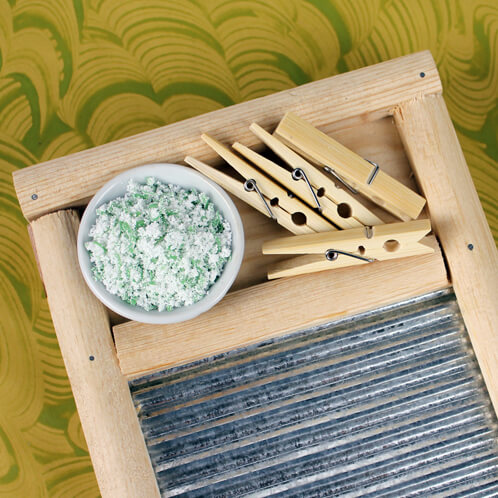
Another type of prop are ingredients used in your product. For example, if your product contains cranberry seeds, a small bowl or splatter of cranberry seeds can create a more pleasing image. Ingredients can create more texture and color. Using the ingredients in your photo can also inform your customer more about what they can expect to find in the ingredient list, or maybe what your product smells like.

In this Shea Butter and Mint Lip Balm Project photo, the sprig of mint gives a pop of color and informs the viewer of the ingredients in the balm.
Be thoughtful when using props in your photos. It’s easy to go overboard! Remember, your product should be the main focus, and props should not distract the eye. In general, it can be helpful to keep ingredient photos on the side or in the background. If you’re able to control the focus on your camera, blurring props can also be useful. Start slow - first photograph your product on its own, then start adding props. If you feel like the product is becoming overwhelmed, you’ve gone too far.
Show some texture
Sometimes the best prop is the product itself. Creating piles and smears of your product not only fills the frame, but gives the customer a better idea of how the product feels on the skin. This works extremely well for scrubs, bath salts, lotions, and balms. Simply scoop out a small bit of the product, and use your finger to create a “swoosh.” It’s best to try this on a surface that’s easy to clean.
A great way to show texture for soap is to show the lather! Soap looks extremely tempting and luxurious when lathered, and it shows more of the product's “personality.” Have a bowl of water nearby, lather of your bar, quickly dry your hands, and snap away! You will probably need to do this several times to get the perfect lather texture or bubbles. And don’t forget to snap some photos of your soap when it’s freshly poured! Wet soap batter is extremely photogenic.

Bubbles are a great way to add texture to your soap photos! Find this Rose Clay and Charcoal Soap Project here.
A great way to create texture with candles is to light it. Wet candle wax will reflect light, which can look really beautiful. Experiment with different lighting to capture your candle flame. A dim room can create a warm glow which looks extra cozy!

Lighting this Romantic Orchid Candle Project shows the flame and burn pool, resulting in a cozy vibe.
Practice, practice, practice
Product photography takes a lot of practice, so don’t feel frustrated if you’re not getting the shots you want right away. And remember, there is no right or wrong way to photograph your products. Take inspiration from others, but work to create your own look and feel. Your products bring your brand to life, and it’s good to stand out and be unique!

Shop This Article


Help and Advice Tags: