Hot process and cold process refer to two popular methods for making soap at home. Both involve mixing a sodium hydroxide lye solution with a mixture of oils. The main difference is the application of heat. There are pros and cons to each method, but both create wonderful bars of soap!
Cold Process Soap
Cold process soap making starts with mixing oils (such as coconut, palm, and olive) with a lye solution. The exact temperature will depend on personal preferences, but both mixtures are usually around 80-120 degrees Fahrenheit. Once blended together using an immersion blender, the lye and oils combine and saponification begins!
Once the lye and oils emulsify, the soap becomes a creamy consistency. Soapmakers refer to this mixture as soap batter, and the exact texture is referred to as trace. Learn more about trace here. At this point, the soap batter can be customized with fragrance, color, and other additives.
After pouring the mixture into molds, the soap requires several days to harden and then undergoes a curing period of 4-6 to achieve optimal hardness and pH balance.
Pros
- Ability to create a wide range of soap batter textures - also known as “trace.” Learn more here.
- Variety of textures allows for plenty of design options, including swirls, layers, and more.
- Produces a “smooth” and “creamy” looking bar.
- Gives more control of temperature, which means you can more easily add fresh ingredients like milk.
Cons
- Achieves optimal firmness and longevity after a 4-6 week cure time. The bars can be used before then, but they will be softer and won't last as long in the shower.
Hot Process Soap
Hot process soap making expedites saponification by applying heat. The process starts in the same way as cold process soap - by mixing the lye solution with a blend of oils. This is typically done using a crockpot or double boiler. The key is applying gentle and consistent heat.
At the beginning of the hot process soap process, the batter looks like cold process soap - creamy, and like a thick pudding. But after a few minutes, the heat transforms the batter. Hot process soap becomes a thick, jelly-like texture, and turns translucent. It has begun to go through gel phase! This happens with cold process soap as well, but with hot process soap it happens much faster because so much extra heat is involved. The soap batter will also begin to grow in volume.
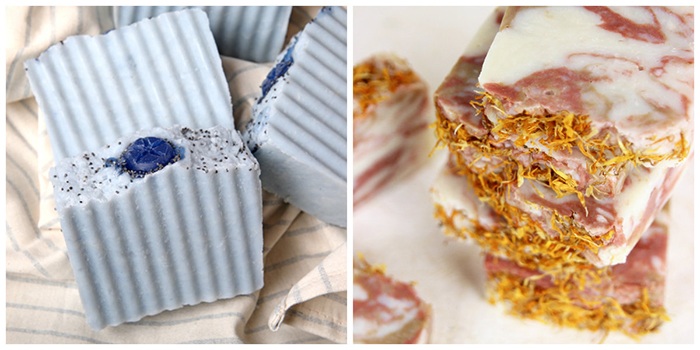
No matter what, hot process soap will have a thick batter with a texture similar to mashed potatoes. Your recipe will affect this slightly - for example, adding sodium lactate to hot process soap makes it slightly more fluid. But no matter what, you’ll never achieve a fluid texture like with cold process. You can still achieve beautiful soap with hot process - there is still room for customization with color, layers, botanicals, and more. But it will always have a slightly “rustic” look to it.
The benefit of hot process soap is that once the soap is removed from the mold, it is gentle enough to use. A cure time of 1-2 weeks is still recommended, but not as crucial as cold process soap. This is because the saponification process has been sped up thanks to the extra heat. This is a huge benefit if you’re in a time crunch!
Pros
- The additional heat speeds up the saponification process. Three cheers for instant gratification - hot process soap can be cut within one day.
NOTE: A 1-2 week cure time is still generally recommended. - Rustic appearance with a distinctive charm.
Cons
- The soap batter is thicker, which can limit the design options. For example, complex and precise swirls are not possible with hot process soap.
- If your fragrance or essential oil has a low flashpoint, some makers find the higher temperatures can burn off the fragrance, causing it to fade.
- It's difficult (but not impossible) to add fresh ingredients like milk and purees; they tend to scorch during the cooking process.
- Needs to be watched while it's cooking - the batter expands in volume and can overflow if your cooking vessel is too small.

Similarities & Differences
Both cold process and hot process soap making techniques start with the same foundational ingredients—lye and oils—yet they diverge significantly in terms of process and final product characteristics.
CP soap is known for its smooth texture and versatility in design, allowing for intricate patterns and textures. In contrast, HP soap is appreciated for its quick turnaround and rustic aesthetic but offers less flexibility in terms of design.
Both methods result in a great bar of soap, and allow for plenty of customization. Great questions to ask yourself if deciding between the two methods are:
- How fast do I need the bars to be useable?
If the answer is less than 4 weeks, hot process is a great option! - Do I want a complex swirl design?
If the answer is yes, cold process soap is for you! - Do I want to use fresh ingredients like milk in my recipe?
If the answer is yes, hot process may scorch your delicate fresh ingredients.
Your Soap, Your Way
The choice between cold process and hot process soap making methods depends on the soap maker’s preferences, needs, and whether the immediate usability of HP soap outweighs the design flexibility of CP soap. Both processes require an understanding of the basic principles of saponification and offer unique opportunities for creativity and customization.
Ready to learn more?
Beginner's Guide to Cold Process
Pros and Cons of Soapmaking Methods
Hot Process and Rebatch Soap Inspiration